

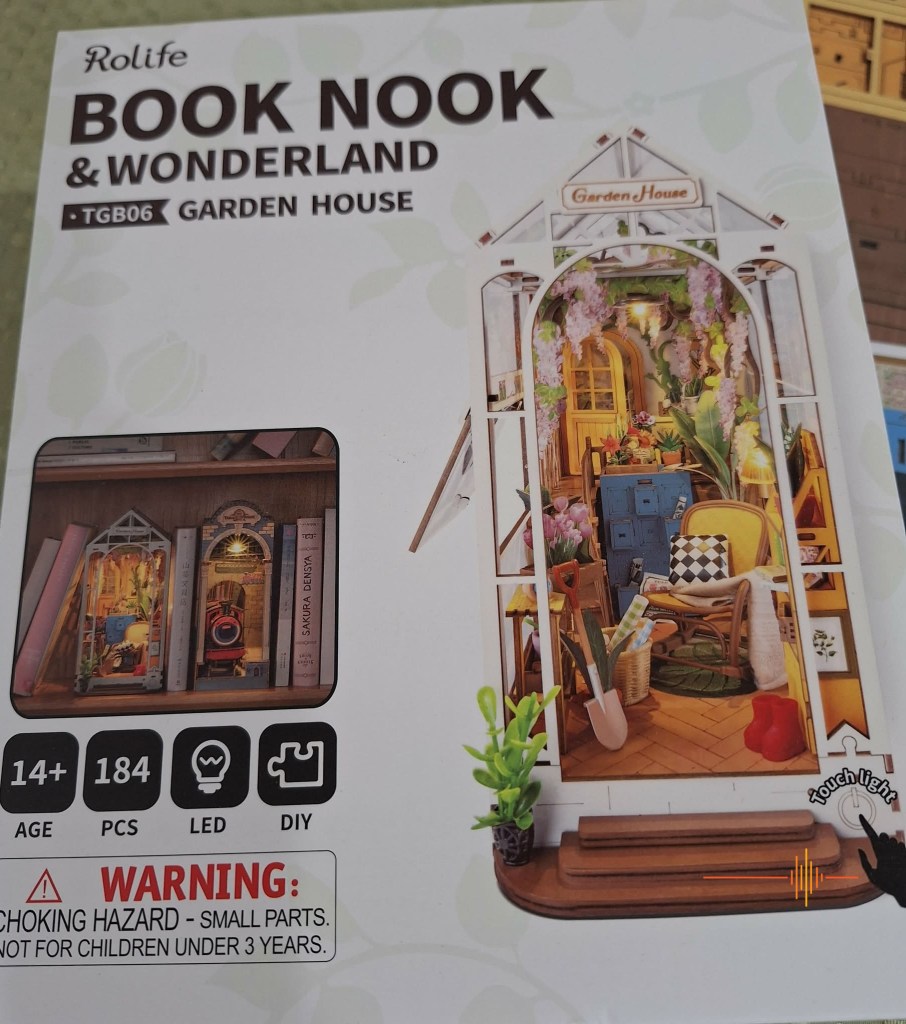
For anyone new to the concept, Rolife’s book nooks are miniature dioramas designed to sit between books on a shelf, turning an ordinary bookcase into a tiny, story-like scene. The Garden House (TGB06) leans fully into that idea, offering a bright, greenhouse-inspired space that feels like a little world tucked between your novels.
Spoiler alert: it looks exactly like the image on the box 🙂
What Is the Rolife Garden House Book Nook?
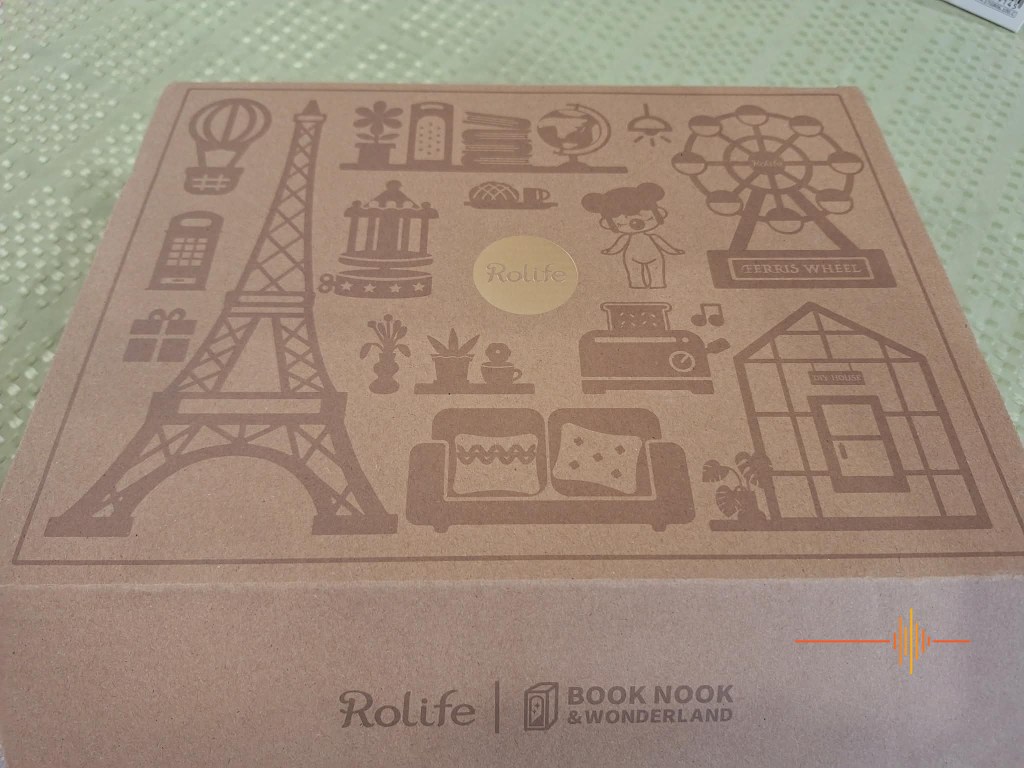
The Rolife Book Nook & Wonderland – Garden House feels like more than just a craft kit, in the sense that you are about to build a miniature world rather than simply assemble a diorama. The packaging sets the tone immediately. It comes in a beautifully whimsical box hinting at the charm and detail waiting inside. It is the kind of presentation that makes you slow down and appreciate what you are about to build before you have even opened it.
Book Nook & Wonderland – the Garden House
Removing the sleeve from the box, you get beautiful images on the packaging
Preparing the Rolife Garden House Build
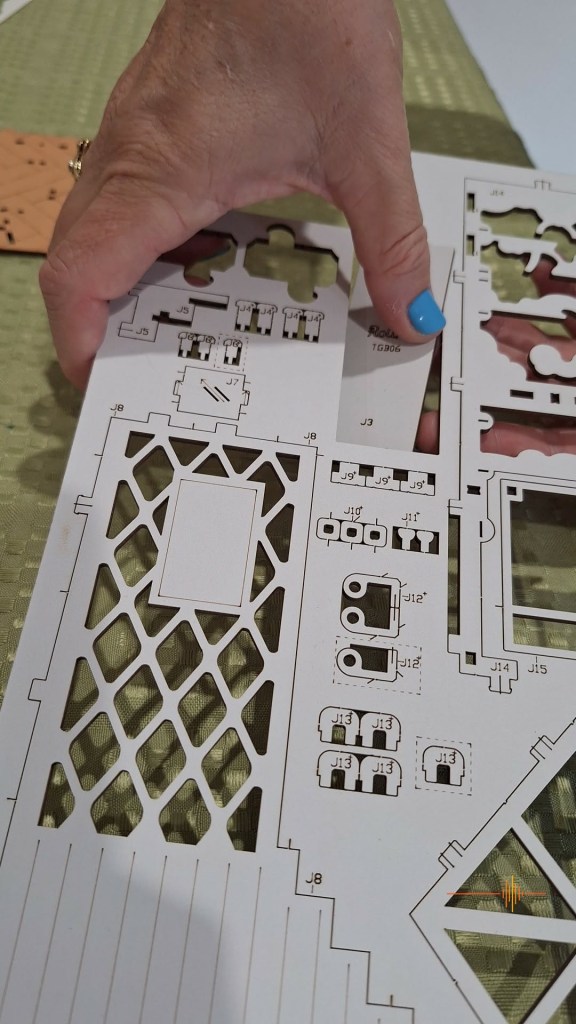
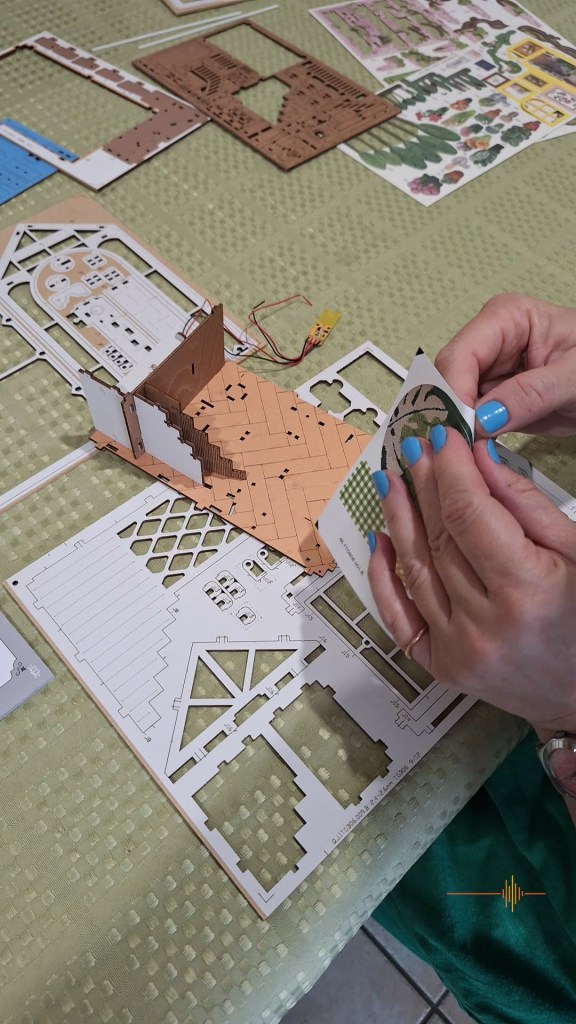
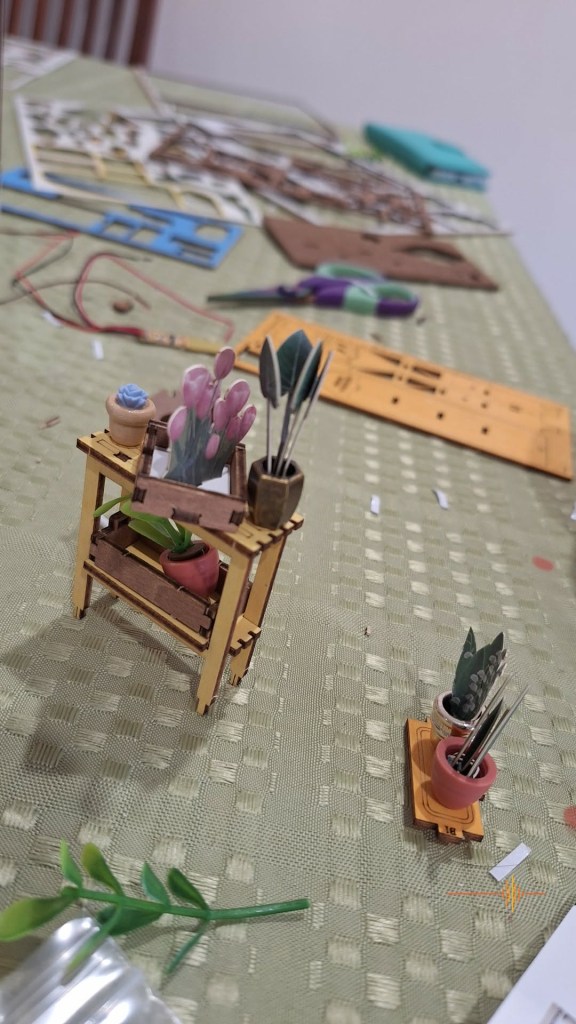
Once inside the box, the sheer number of components becomes clear. Everything you need is included, but that does not mean you can dive straight in. This is not a “figure it out as you go” kind of project. The first and most important step is to lay everything out properly. You are going to need a lot of space for this project. Taking the time to organise the pieces makes a huge difference later on, especially when you are trying to identify tiny components mid-build.

Lay everything out before you begin
Equally important is reading the instructions from start to finish before beginning. Not skimming, not jumping ahead, but actually understanding the flow. There are moments in the process where knowing how a later step fits into earlier construction can save you from undoing fiddly work. In our case, my sister handled the instructions while I focused on the build itself, which turned out to be a surprisingly effective system.
Build Quality and Materials
The overall quality of the pieces is one of the stronger aspects of this kit, and it is clear a lot of thought has gone into how everything is manufactured. The wooden components are precision laser-cut, which means they generally pop out cleanly and fit together with a satisfying level of accuracy. Many of the boards come pre-coloured and marked, so you are not dealing with raw wood or needing to paint anything yourself, which saves time and keeps the final finish consistent.
That said, the kit uses a mix of materials including wood, MDF, and printed paper elements and you do notice that contrast during the build. The wooden structure feels sturdy and well-engineered, while some of the smaller decorative details rely on thicker printed paper rather than fully three-dimensional pieces. This works visually, especially once assembled, but it does mean certain parts feel more delicate in your hands. The tabs can be quite snug, and while that contributes to a tight final fit, it also means there is a fine line between “secure” and “too much force,” particularly with the paper components.
Easy to pop out pieces
The quality sits in that satisfying middle ground. It is not premium handcrafted timber, but it is far from flimsy. The precision cutting, pre-finished surfaces, and thoughtful design choices all contribute to a build that feels polished and intentional, provided you handle the more delicate elements with a bit of care.
Building Experience: Patience, Precision and Tiny Parts
This kit is very much a test of patience and precision. Although we constructed this kit in four hours, I would recommend taking your time (if you have the space to leave it all set up and laid out) and returning to it every few days to work through the project slowly. Good eyesight is essential, as many of the pieces are incredibly small and detailed. You will also need steady, dexterous fingers, and a pair of tweezers would have been very handy. Some of the paper tabs that slot pieces together can be quite tight, and if you try to force them, they may split. A small but important tip is to slightly trim certain tabs so they slide into place more cleanly. It is a minor adjustment that can prevent unnecessary frustration.
Removing the backing from the double sided tape requires a certain dexterity
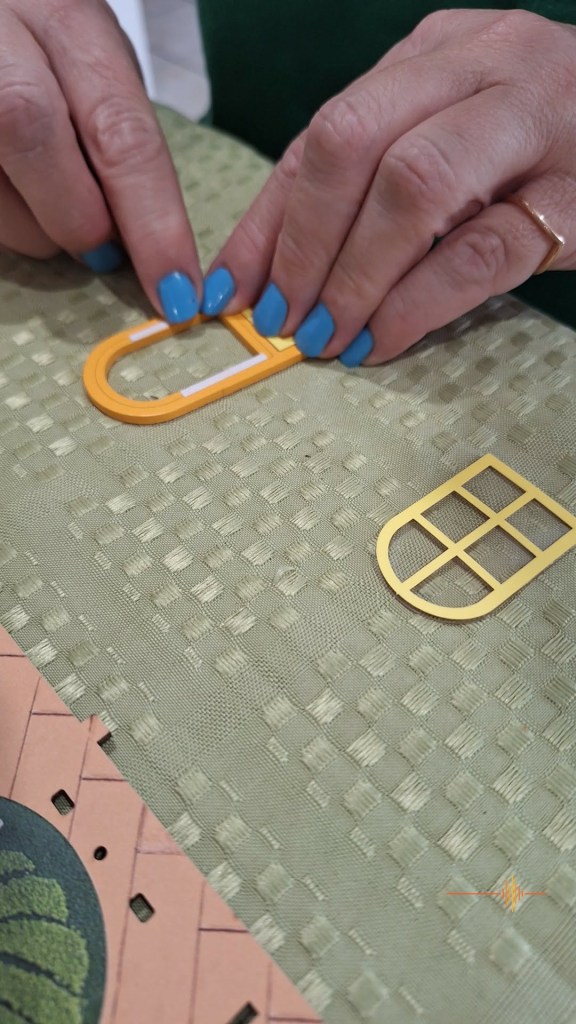
A nice mix of stickers and printed paper parts
The build itself took us exactly four hours, starting at 11:15am and finishing at 3:15pm, which sits comfortably within Rolife’s general estimate of around three to six hours depending on experience level. Impressively for me, across that time, only five expletives were uttered, which says a lot about how well-designed the kit is, even when it becomes challenging.
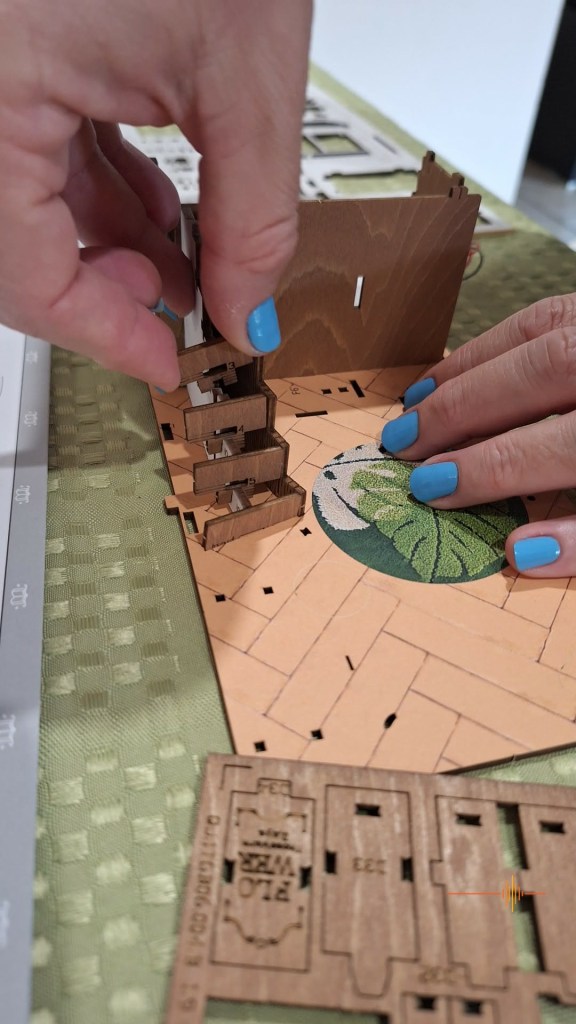
First expletive was uttered popping the stairs in
The pre-cut slots are labelled in the instruction booklet so everything goes where it should
Second expletive was uttered when I broke a small section of the stair railing

Installing the LED Lighting and Wiring
The most testing part of the process was undoubtedly the wiring. Up until that point, the build felt methodical and almost meditative. The wiring stage shifts things slightly, requiring more concentration and care. It is not impossible, but it does demand patience and a steady hand to get everything connected and positioned correctly. I found removing the cover to the battery housing fiddly and frustrating so I threw that at my sister to do!
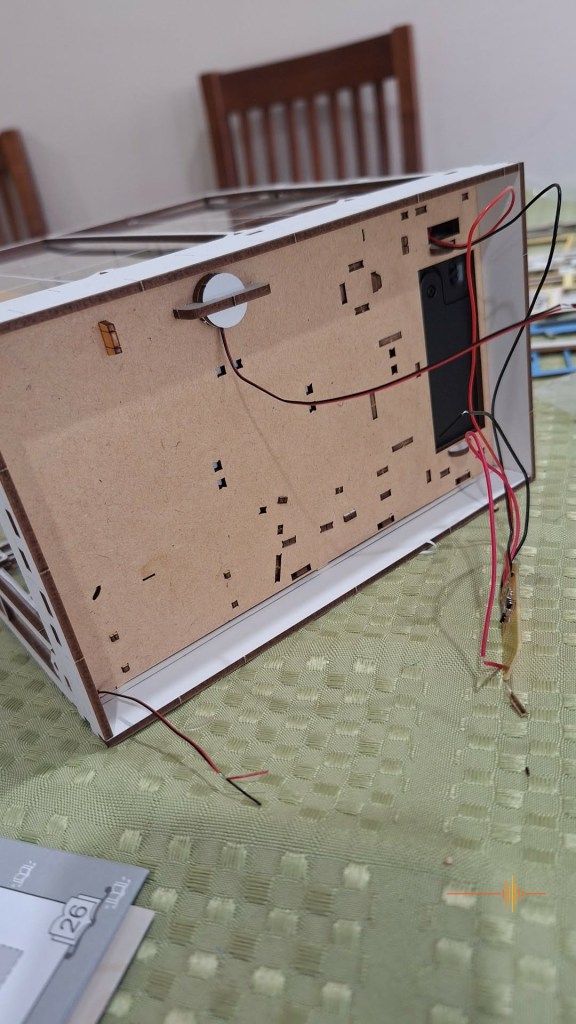
The wires are so thin it was difficult to get them together.
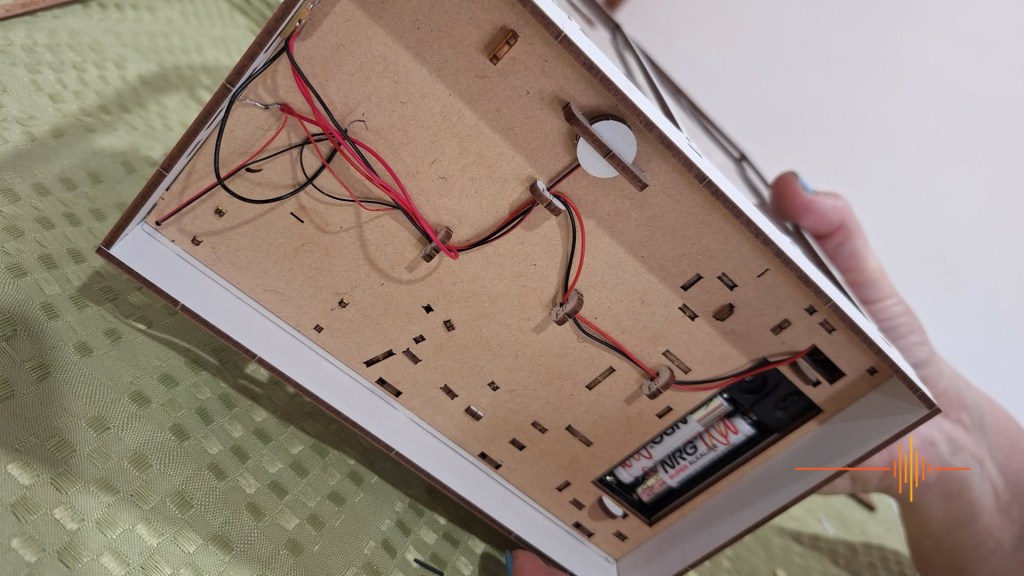
Once the circuit is created, small cut out pieces hold them neatly in place
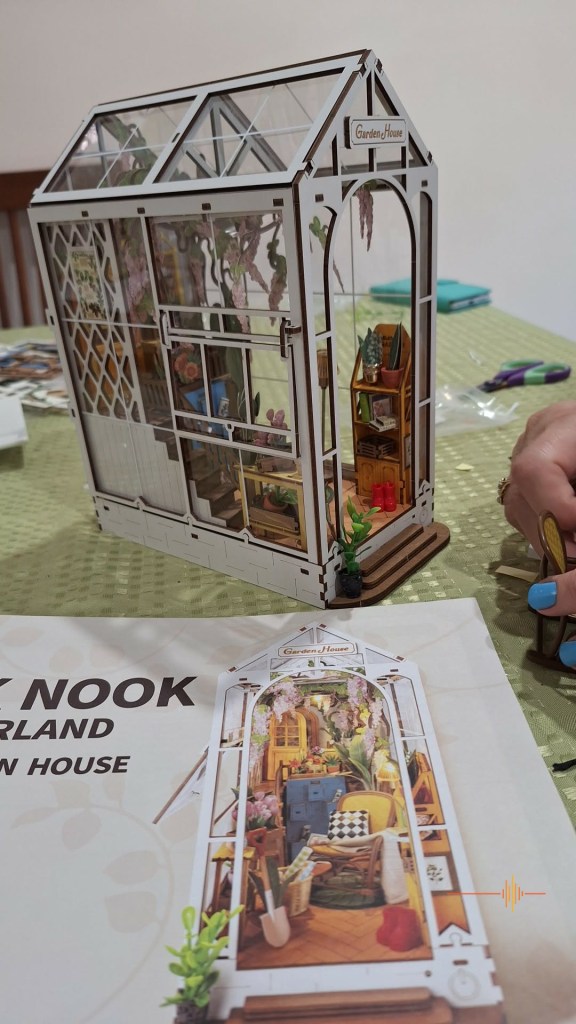
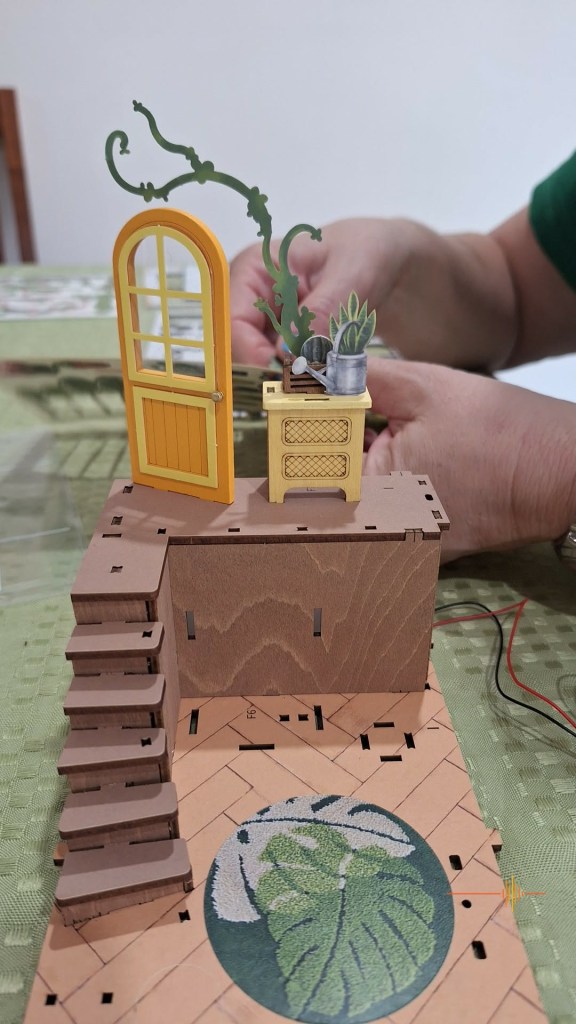
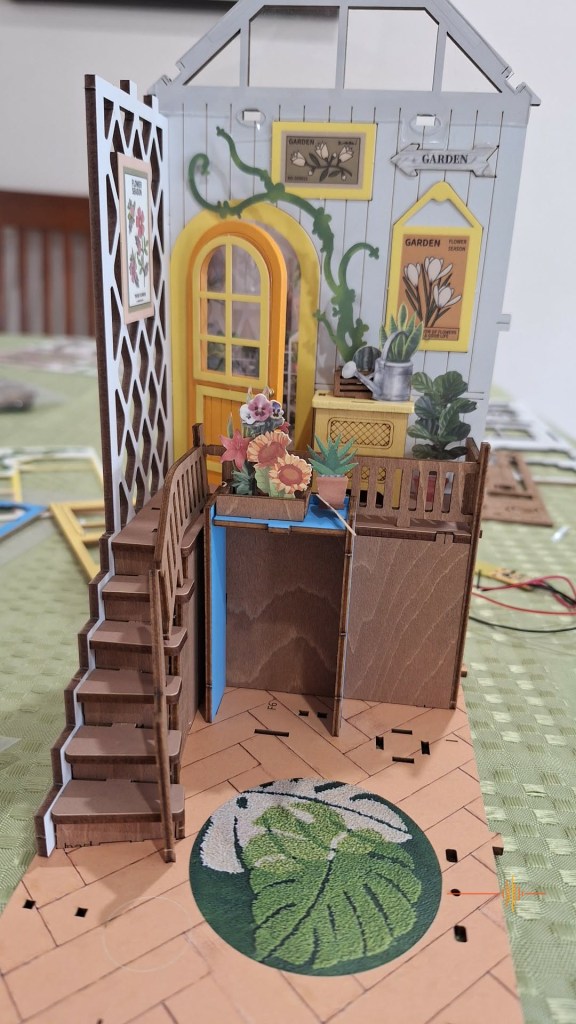
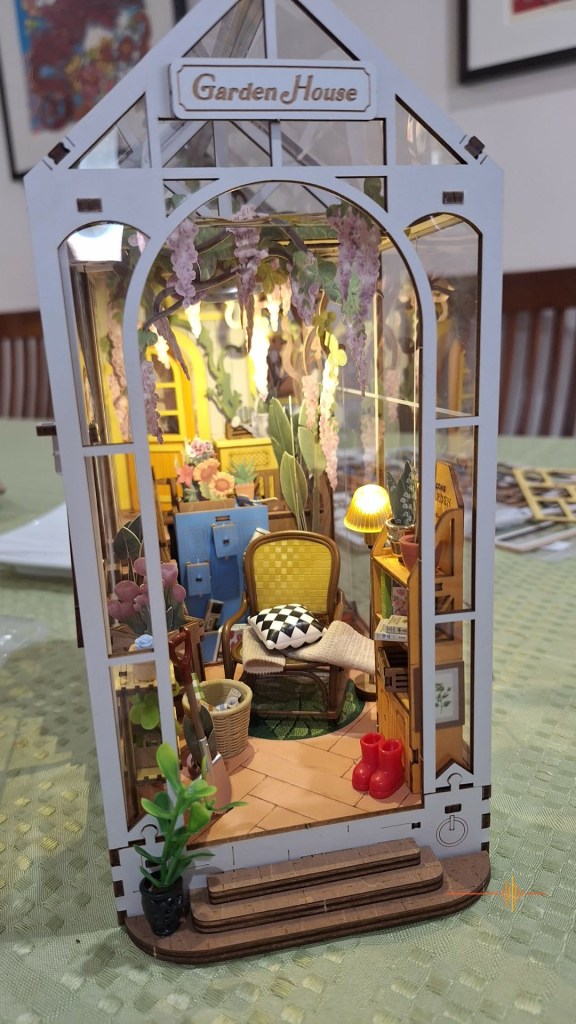
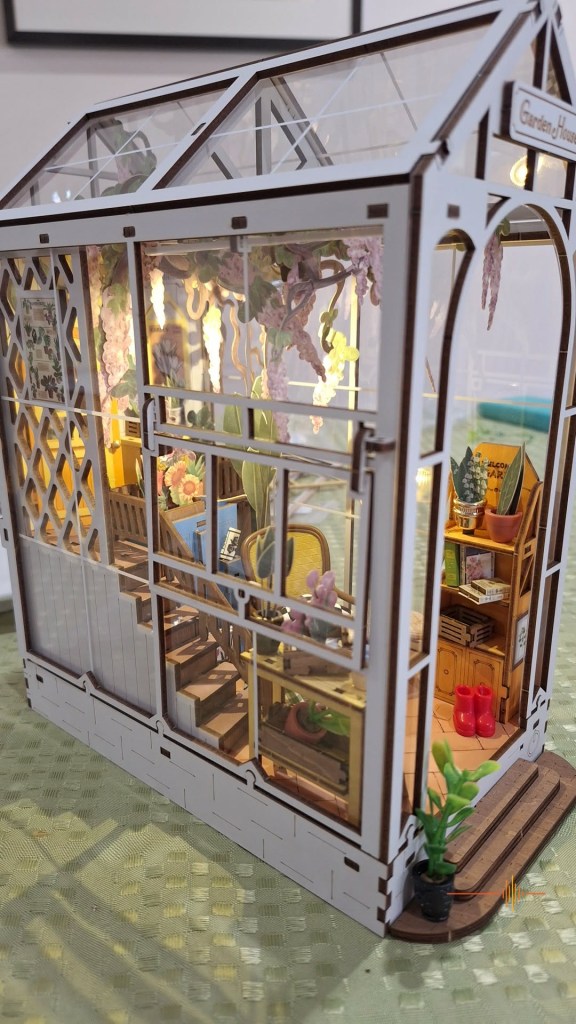
What sets the Garden House apart within the range is its design. The transparent walls and roof give it a light, open feel, almost like a miniature greenhouse. Once the LED lighting is in place, it creates a warm, cosy glow that really brings the scene to life.
We tested the lighting to ensure it worked before completing the project
The Garden House is just one of a surprisingly large range of designs. There are cosy, realistic scenes like bookstores and cafés, more whimsical builds like magical houses, and travel-inspired options that evoke different places and moods. Popular designs include Sakura Wine Alley, Sunshine Town, Time Travel Station, Street Scene, and Silent Corner Study. Each one offers a slightly different building experience and aesthetic, and I imagine it would be a slippery slope from owning and constructing one, to owning the lot.
The Garden House itself sits toward the more detailed end of the spectrum, with over 170 pieces and a slightly more advanced feel, particularly during the wiring stage where several more expletives were uttered. That added complexity makes the finished result feel even more rewarding. I know we let out a huge cheer of joy when the Garden House lit up! It was gorgeous!
Tiny details had us exclaiming “how cute”!
Design Details and Finished Appearance
Once completed, the final piece is genuinely delightful. It captures that storybook, whimsical aesthetic perfectly, and it draws attention in the best way without feeling over the top. There is a real sense of satisfaction in knowing you assembled it piece by piece.
Overall, this is a thoughtfully designed kit that delivers both a challenge and a reward. It is best suited to those who enjoy detailed, hands-on projects and are willing to take their time. If you approach it with patience, preparation, a sister who will put up with you for four hours straight, and the right tools, it becomes a deeply enjoyable experience that results in something truly special. And if you find yourself wanting more once you finish, there is an entire range waiting to pull you further down the rabbit hole.
Final Verdict: Is the Rolife Garden House Worth Buying?
The finished product
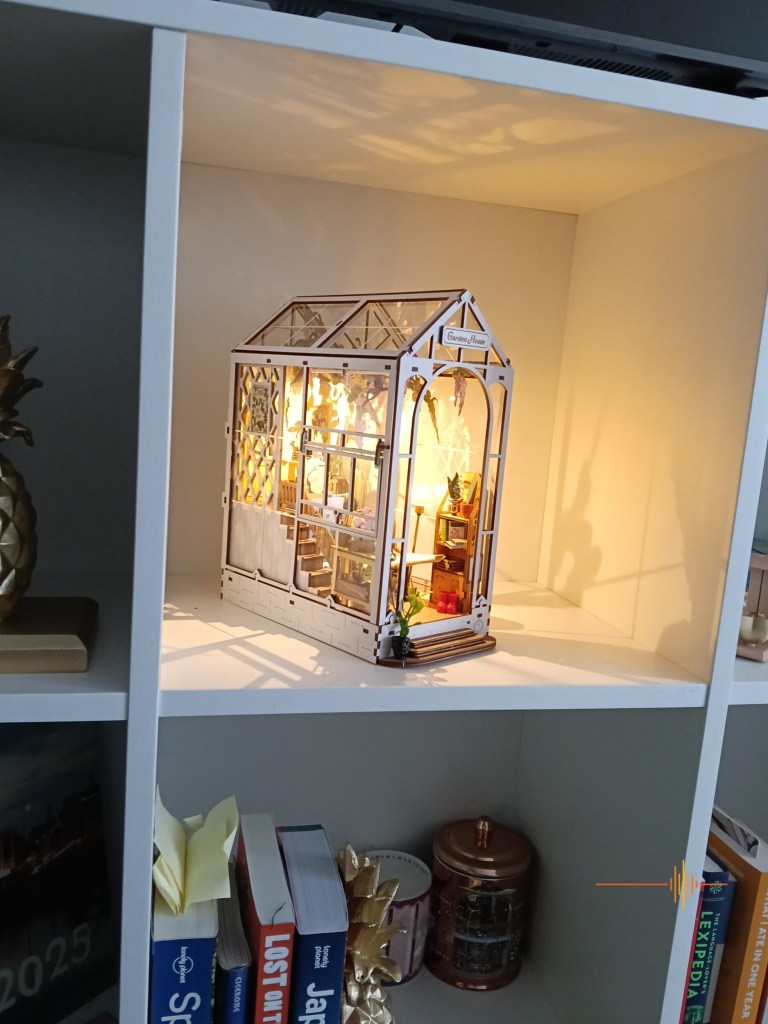
On the bookshelf
You can get yours at Rolife for A$76.99.
With thanks to Rolfie for an afternoon of whimsical fun.
Comments are closed.