

You’ll save lots of money by starting your own flower and vegetable transplants from seed vs. buying greenhouse-grown plants in the spring.
Indoor seed-starting isn’t as tricky as it might seem, and you don’t need expensive lights and fancy equipment.
However, you do need to know a few key hacks to sidestep common troubles that have foiled many rookies.
Here’s a look at five top things that can go wrong and how to prevent them:
1.) Lousy seed-starting mix
Don’t scrimp on cheap bags of heavy potting soil, or worse yet, even heavier and potentially bug- or disease-laden soil dug up outside.
Seeds and seedlings need loose and very well drained growing medium — ideally a lightweight, “fluffy” potting mix that doesn’t contain any soil. Good mixes are usually a blend of sphagnum peat moss or coir (coconut fiber) and perlite (those foam-like, BB-sized white balls).
To maximize seed germination, some seed-starters use small pots of moistened vermiculite, which is a lightweight, moisture-holding mineral sold in bags at most garden centers. (Margarine tubs with a few drainage holes poked in the bottom are free and ideal.)
Once the seeds sprout, the seedlings can then be transplanted to individual small pots or to cell packs or trays. (Four-packs or six-packs saved and cleaned from prior purchases can be recycled.)
2.) Too cold or too dry to sprout
Seeds need both warmth and moisture to sprout.
Most seeds will germinate in two weeks or less at temperatures between 70 to 80 degrees. (Check seed packs for exceptions.)
Note that that’s warmer than many people keep their house during the prime seed-starting months of February, March, and April.
One heat-aid option is to set seeded trays on top of a “heat mat,” a plug-in plastic mat that’s specifically made for seed-starting. These typically cost $18 to $30 in seed catalogs and garden centers and last for many years.
A free alternative is setting your seed trays on top of an appliance that produces warmth (i.e. a refrigerator or water heater).
Seeds must be kept moist at all times but not to the point of sogginess, which is the reason for that well drained potting mix.
Dampen the mix slightly before seeding, and then tamp the seed into the surface of the mix. Seed packs tell you exactly how deep for each type of plant, but it’s usually within the top quarter-inch. (A few varieties such as lettuce, petunias, begonias, and impatiens shouldn’t be buried at all but tamped atop the potting-mix surface.)
You can then lightly sprinkle the mix until it’s damp throughout. A better technique that’s less likely to drive the planted seed too deep is setting the pots in a tray or basin with an inch or two of water.
Let the potting mix soak up water through the holes in the bottom of the pots for about 10 minutes, then dump out the remaining standing water. You might need to repeat this once or twice if the mix is going dry before the seedlings are up.
Bonus tip: Encourage germination by covering the seeded pots with plastic wrap to retain moisture. Remove it once the seedlings are up.
Seed packs will tell you if any other additional steps are needed, such as pre-soaking or scratching the seed coats. A few varieties are harder to sprout than most.
Read George’s column on how to get those “stubborn” seeds to sprout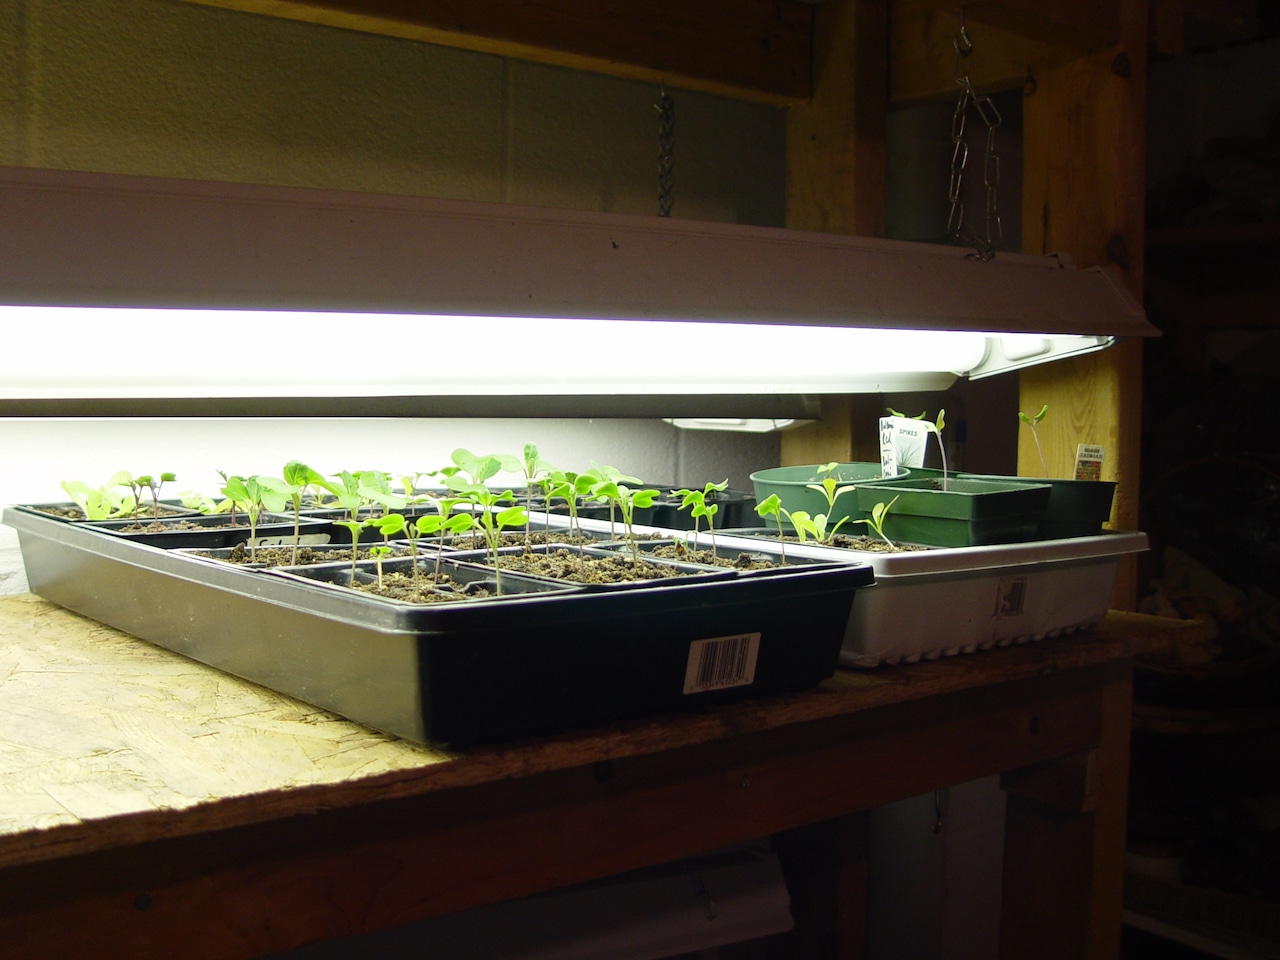 Growing seedlings closely under LED lights in a cool room is a good way to encourage stocky growth.George Weigel3.) The seedlings get spindly
Even sunny windows aren’t bright enough to yield stocky seedlings.
You’ll get much better results by investing in tubular fluorescent or LED workshop lights and hanging them on chains so you can keep the lights just two or three inches above the plants as they grow.
More expensive “grow” lights aren’t necessary if you’re just growing seedlings for several weeks and then planting them outside.
Lights should run 14 to 16 hours per day, then go dark overnight to mimic summer outdoor lighting.
Read George’s column on his cheap and simple indoor seed-starting system
Seedlings can also get “leggy” when it’s too warm.
While seeds sprout best in that 70- to 80-degree range, seedlings will grow stockier in cooler temperatures – i.e. the mid-50s to mid-60s.
Unheated spare rooms, basements, and sun porches are ideal seedling settings, especially if you can rig up a workshop light or two overhead.
4.) The seedlings rot or keel over
The most common downfall once the seedlings are growing is a disease called “damping off.” This is usually a function of a too-wet growing mix or too much humidity.
Starting with that lightweight, high-quality potting mix is the best thing you can do to prevent damping-off and other seedling-killing diseases.
The second thing you can do is avoiding overwatering.
Don’t let water in the tray underneath your seedlings or add more water if the mix is already damp. Too-wet mix eliminates oxygen, rots roots, and causes the seedlings to keel over at the base.
A good way to get watering right is to “bottom-water.” Rather than sprinkle water over top of the seedlings, add water to the trays underneath and let the mix soak it up. If there’s any left after about 10 minutes, dump the excess — the same procedure as when you were sprouting the seeds in the first place.
A third disease-preventing step is disinfecting any recycled or previously used containers. At least wash and rinse them thoroughly, or better yet, soak them for about 10 minutes in a solution of 10 percent bleach and 90 percent water.
And a fourth disease-preventing “trick” that also encourages stockier growth is running a fan on low over the seedlings. The breeze dries damp leaves and triggers hormones in the seedlings that lead to sturdier stems.
5.) The seedlings are too little or too big
This is a function of timing, i.e. when you start the seeds.
Start too soon, and the seedlings are getting big, floppy, and root-bound before it’s possible to plant them out. Start too late, and your seedlings are smaller than ideal when the weather says plant.
Determine start times by counting backwards from when you’d like to have planting-sized plants ready.
Allow eight to 12 weeks total — one to two weeks for the seed to germinate, six to eight weeks of growing time, and another week to 10 days to gradually acclimate the seedlings outside before planting.
Varieties that can take frost and slow-growers that need a long lead time can be started as soon as early February. Examples: veggies such as broccoli, cabbage, kale, leek, onion, lettuce, parsley, and cauliflower, and flowers such as pansies, violas, snapdragons, and most perennials.
The bulk of flowers and vegetables, though, can’t go outside until after all danger of frost, which historically is around Mother’s Day (mid-May) for most of the Harrisburg area. (Our average last spring frost dates have crept up, though, to mid-April.)
Depending on your location, frost-risk tolerance, and target planting dates, early to mid-March is prime indoor seed-starting time for warm-weather veggies such as tomatoes, peppers, eggplants, basil, cucumbers, and melons, and summer annuals such as marigolds, zinnias, petunias, impatiens, ageratum, celosia, gloriosa daisy, nicotiana, and vinca.
See George’s plant-by-plant list of when and how to plant each type of edible
Comments are closed.