
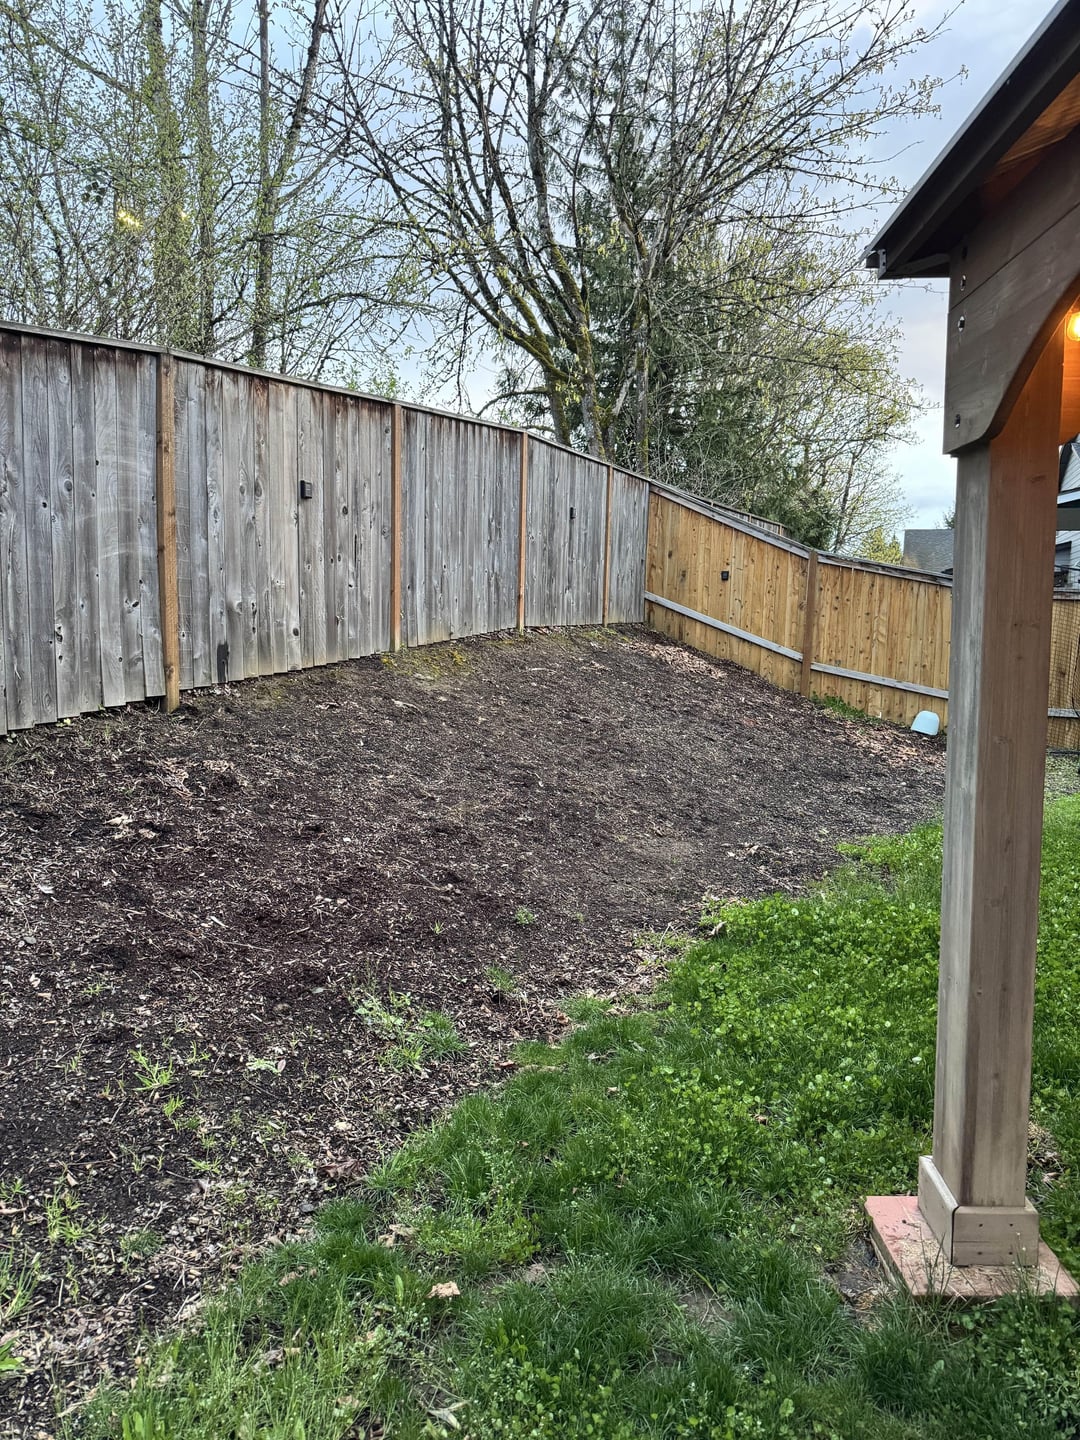
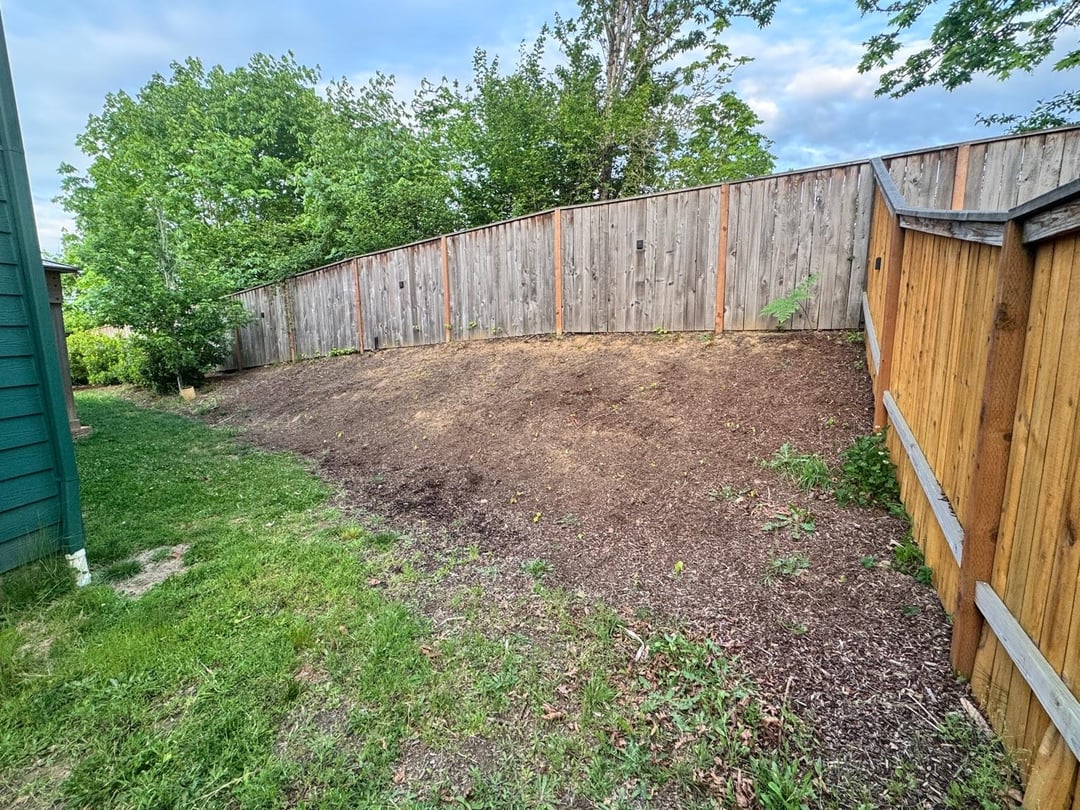
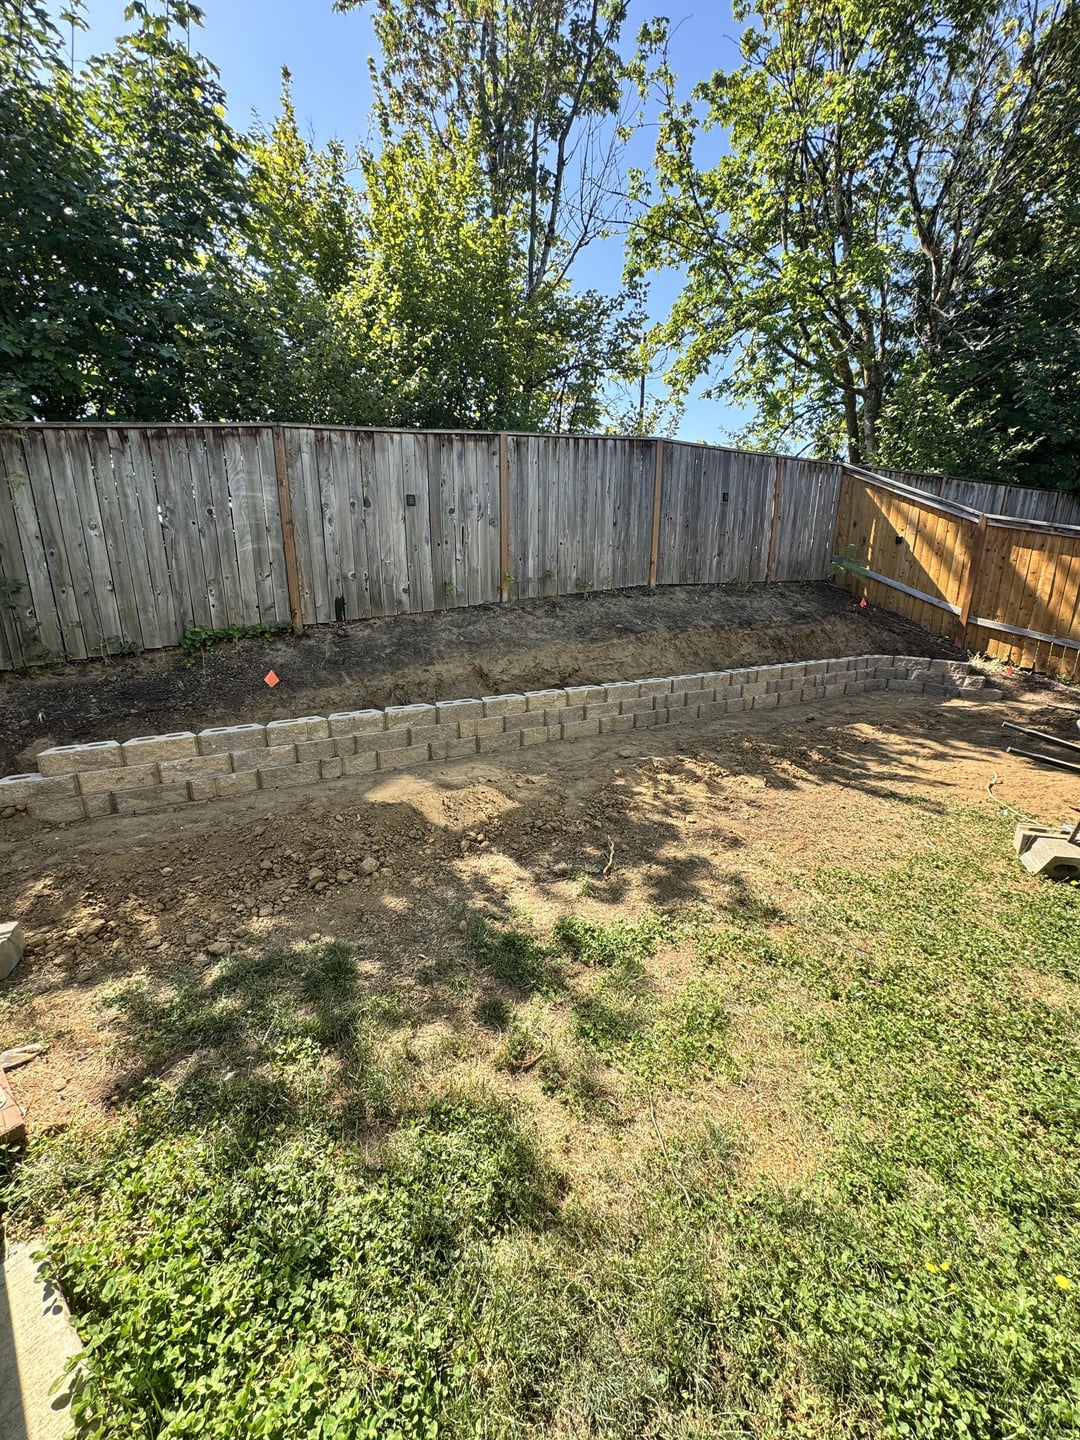

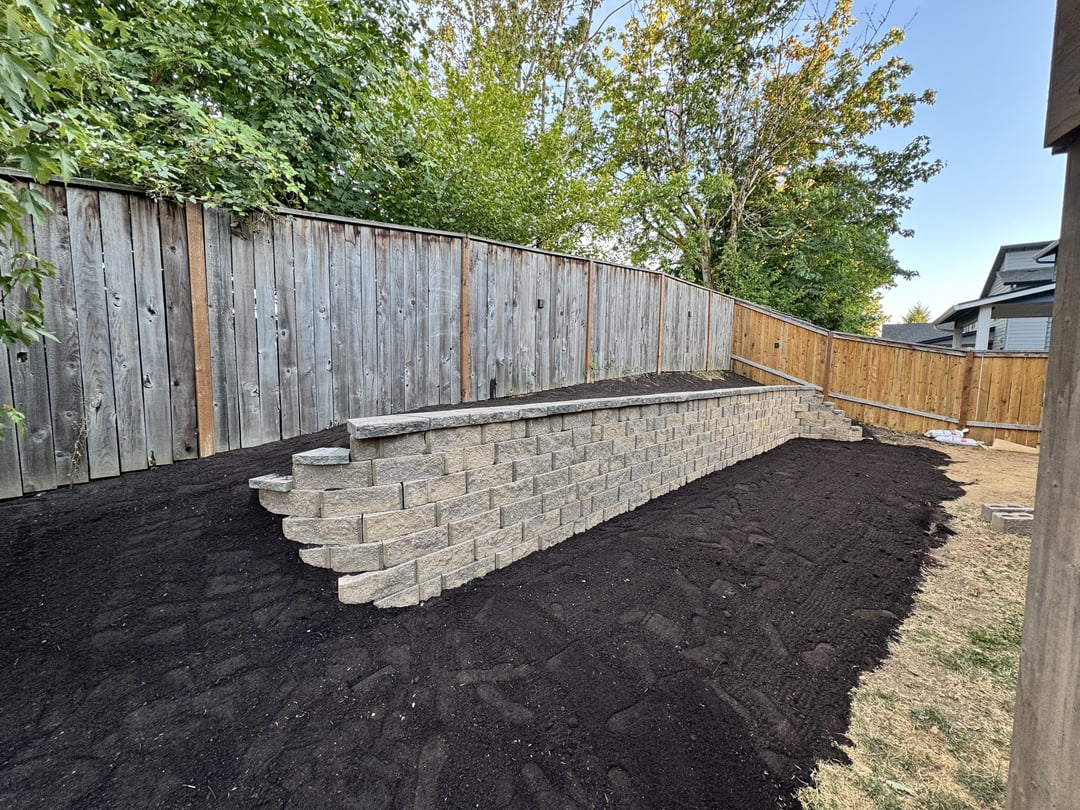
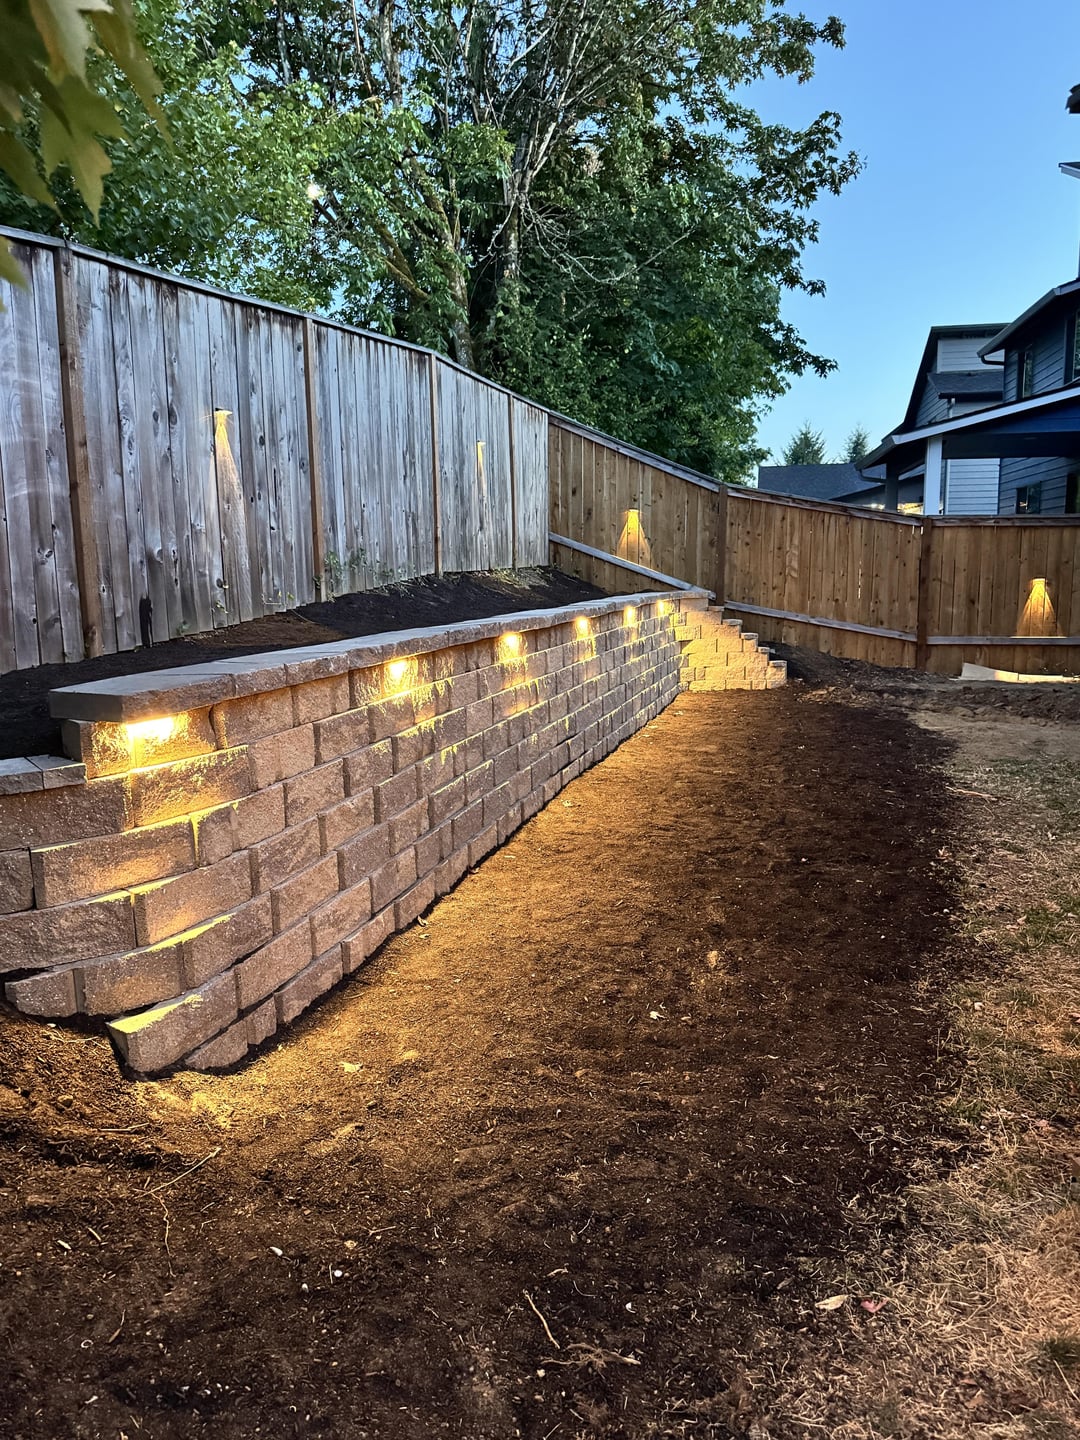
This summer I tackled my first major outdoor project: building a 35 foot-long retaining wall to help level out our sloped backyard, manage drainage, and make the space more usable (and better looking). I wanted to share photos and a breakdown of how it all came together
⸻
Materials and Why I Chose Them
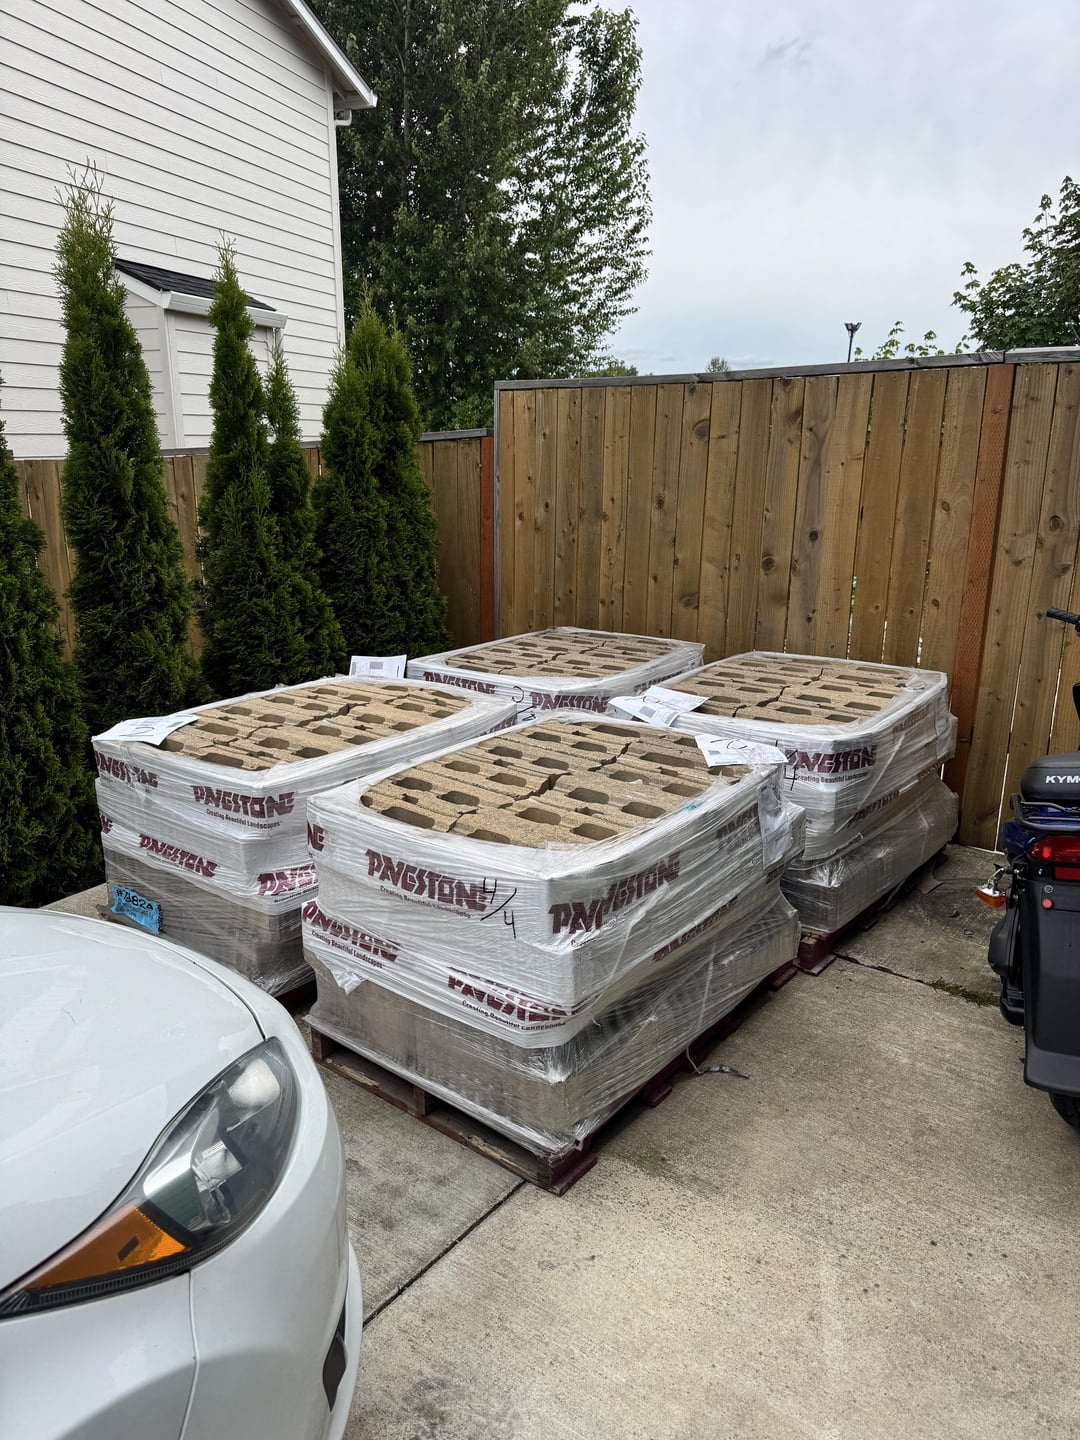
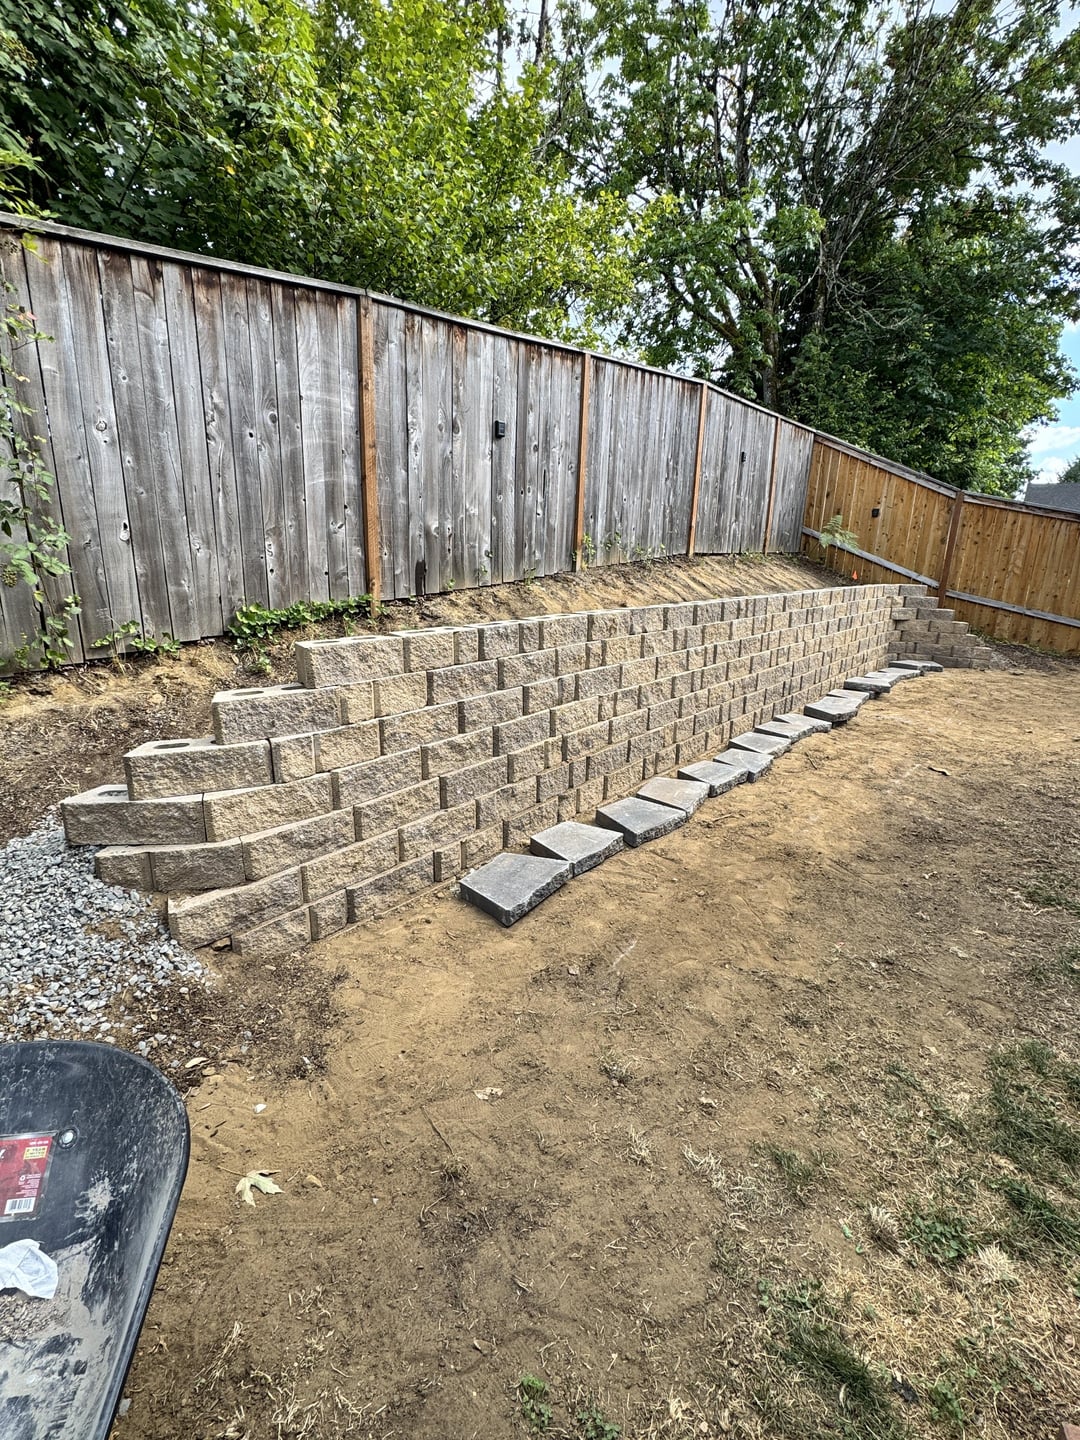
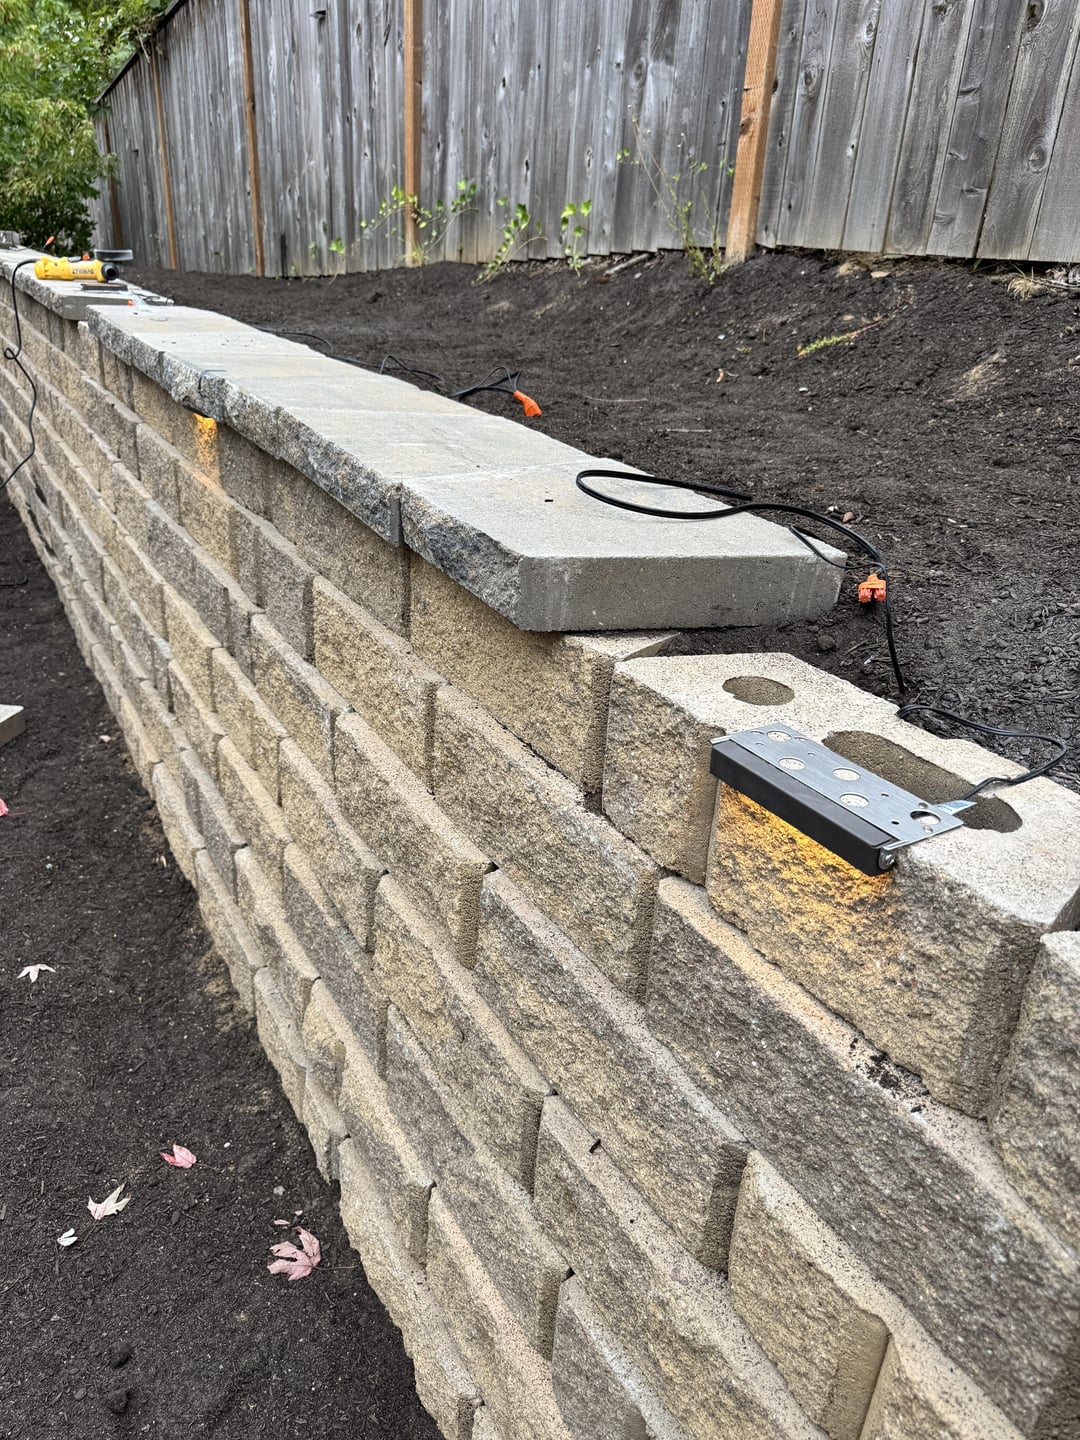
• Wall Bricks: I used engineered concrete retaining wall blocks. They’re heavy (which helps with stability), interlock well, and were locally available at a decent price.
• Backfill: A mix of clean rock and compactable fill dirt to ensure proper drainage and structural support.
• Lighting: I added six low-voltage cap lights to the top layer for both function and aesthetics. These are wired into a weatherproof transformer with a dusk-to-dawn timer.
• Tools/Equipment: I rented a skid steer for excavation and hauling, and bought a few new tools I didn’t already own (angle grinder, reciprocating saw, etc.)
⸻
Step-by-Step Build Process
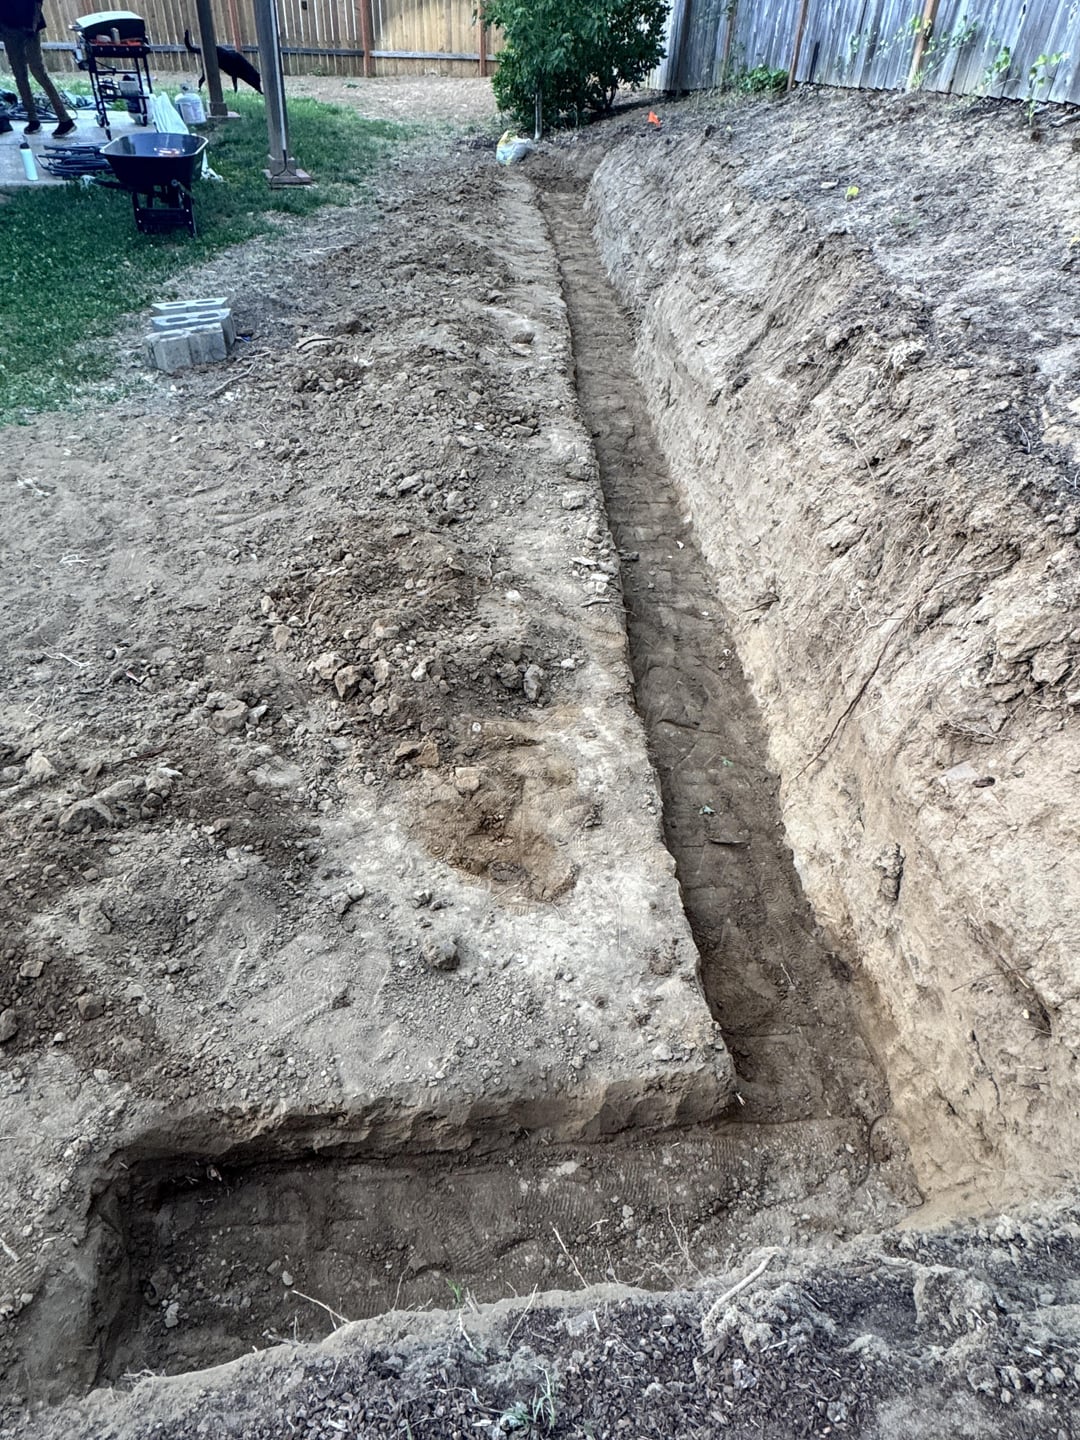
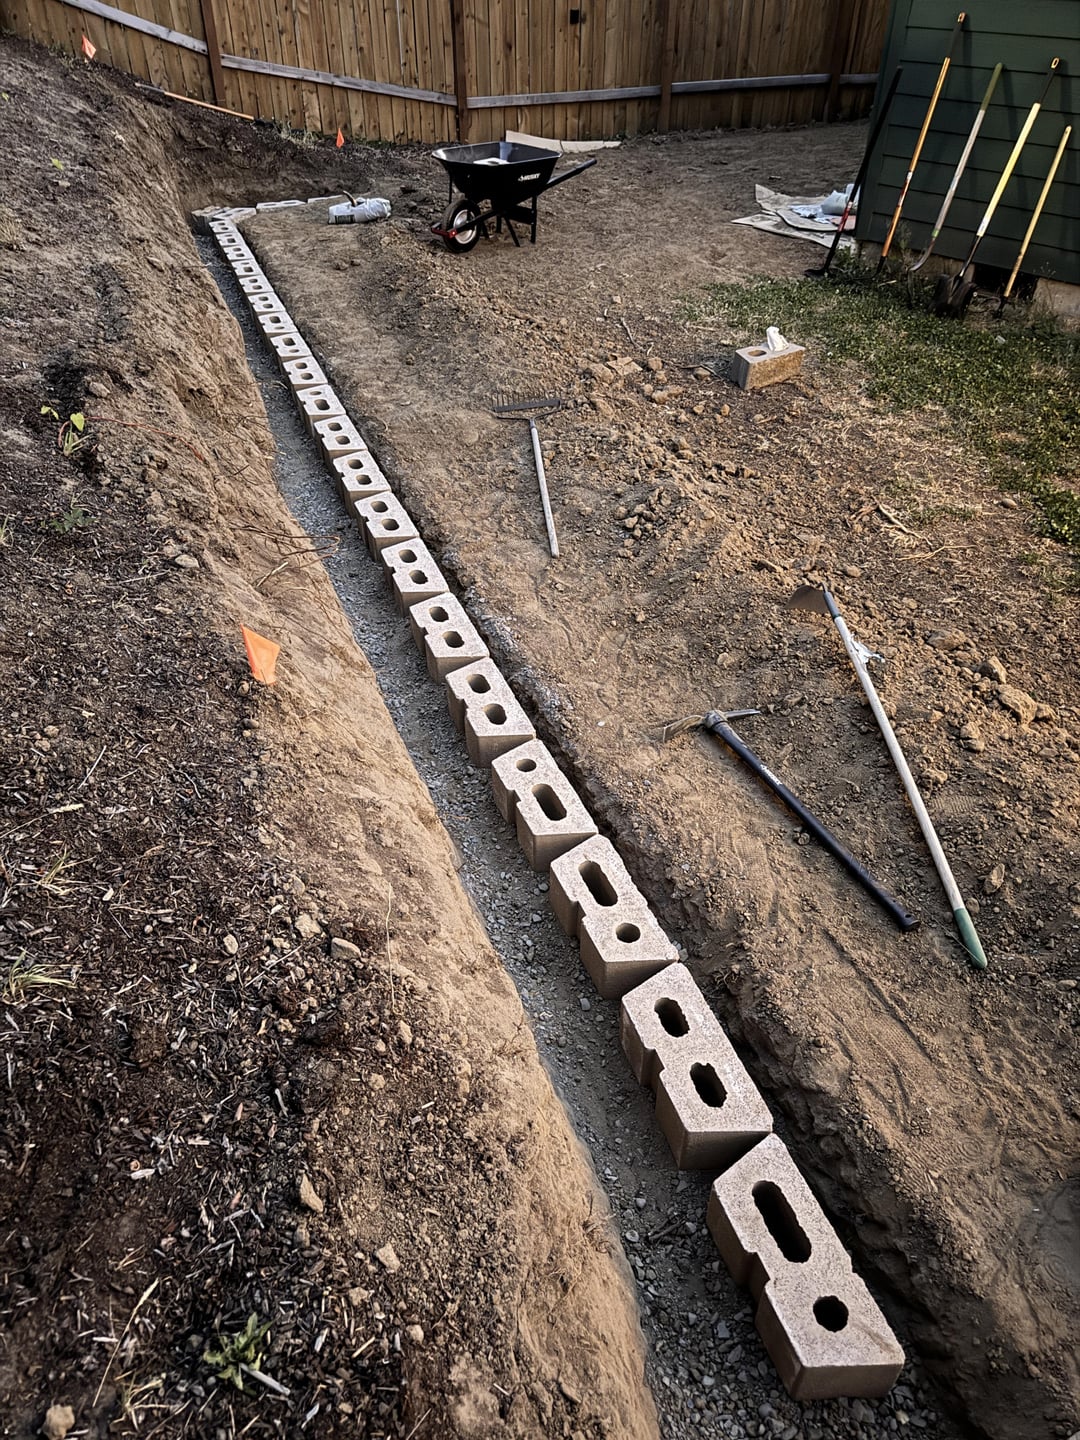
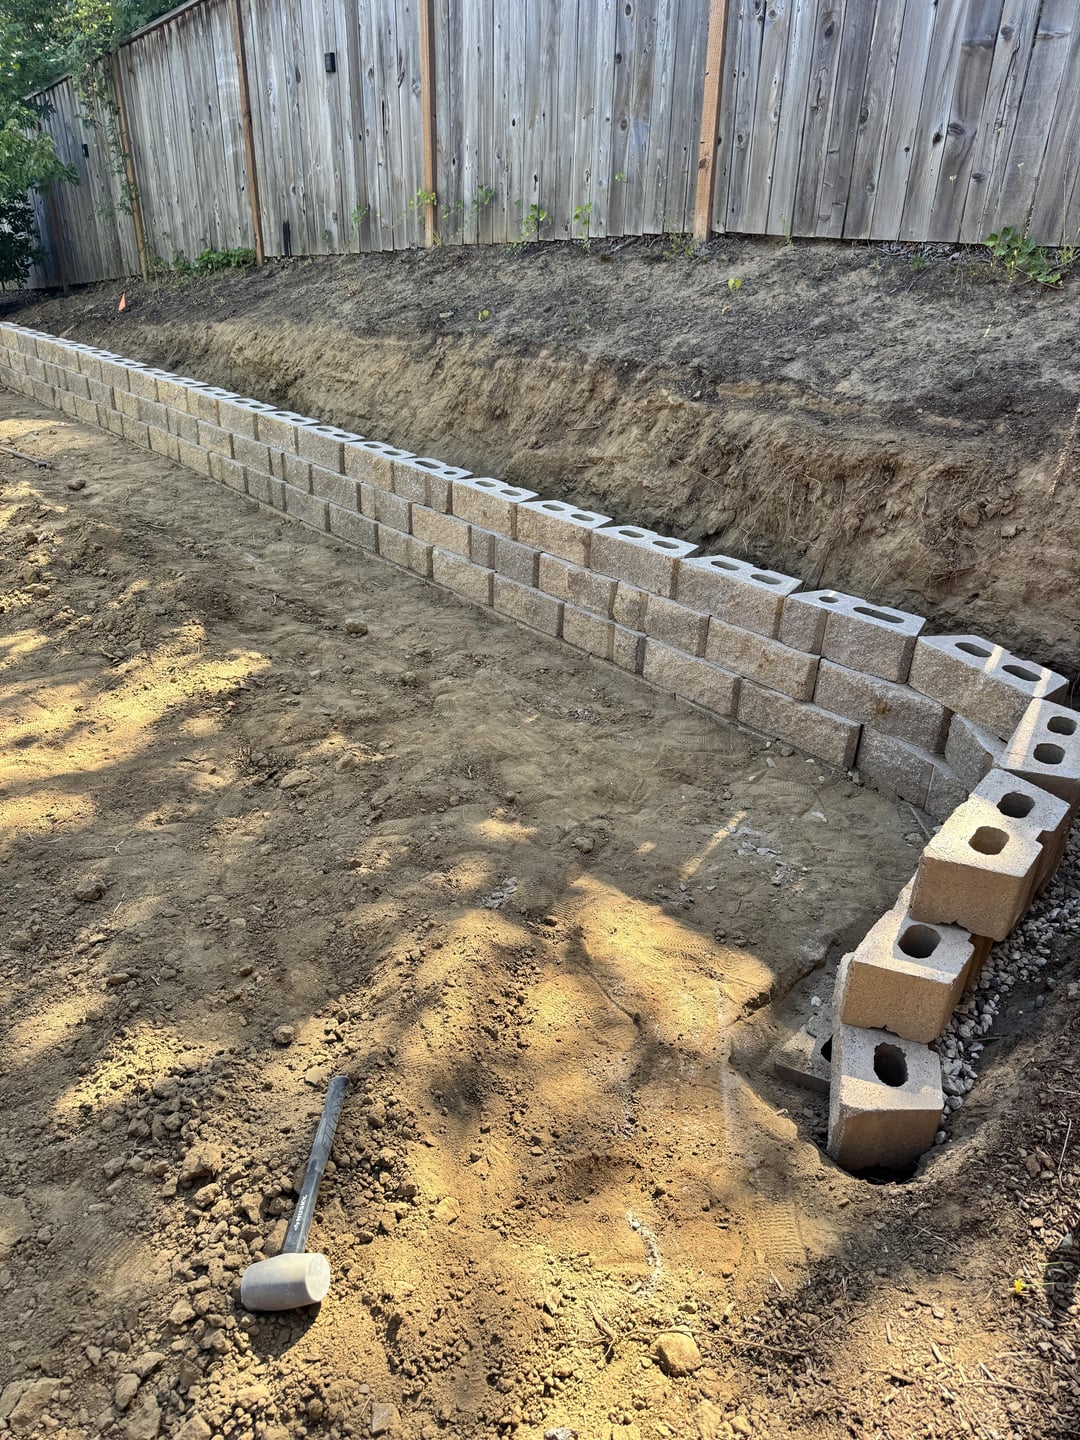
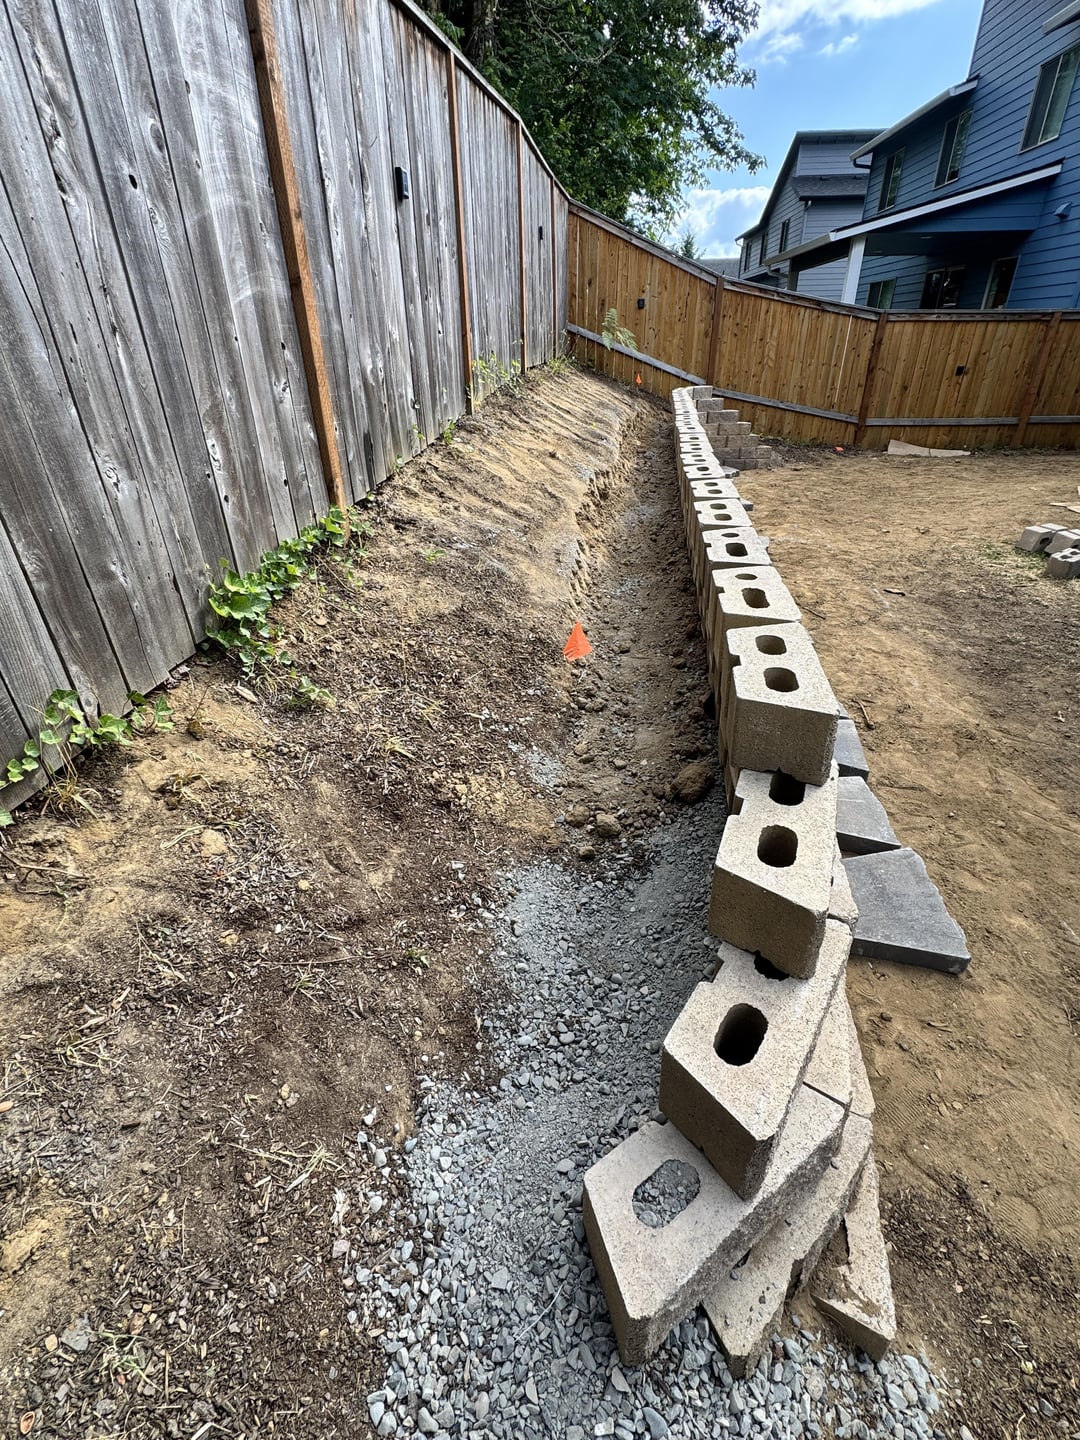
1. Planning + Layout: Measured and marked out the wall line, accounting for slope and height transitions.
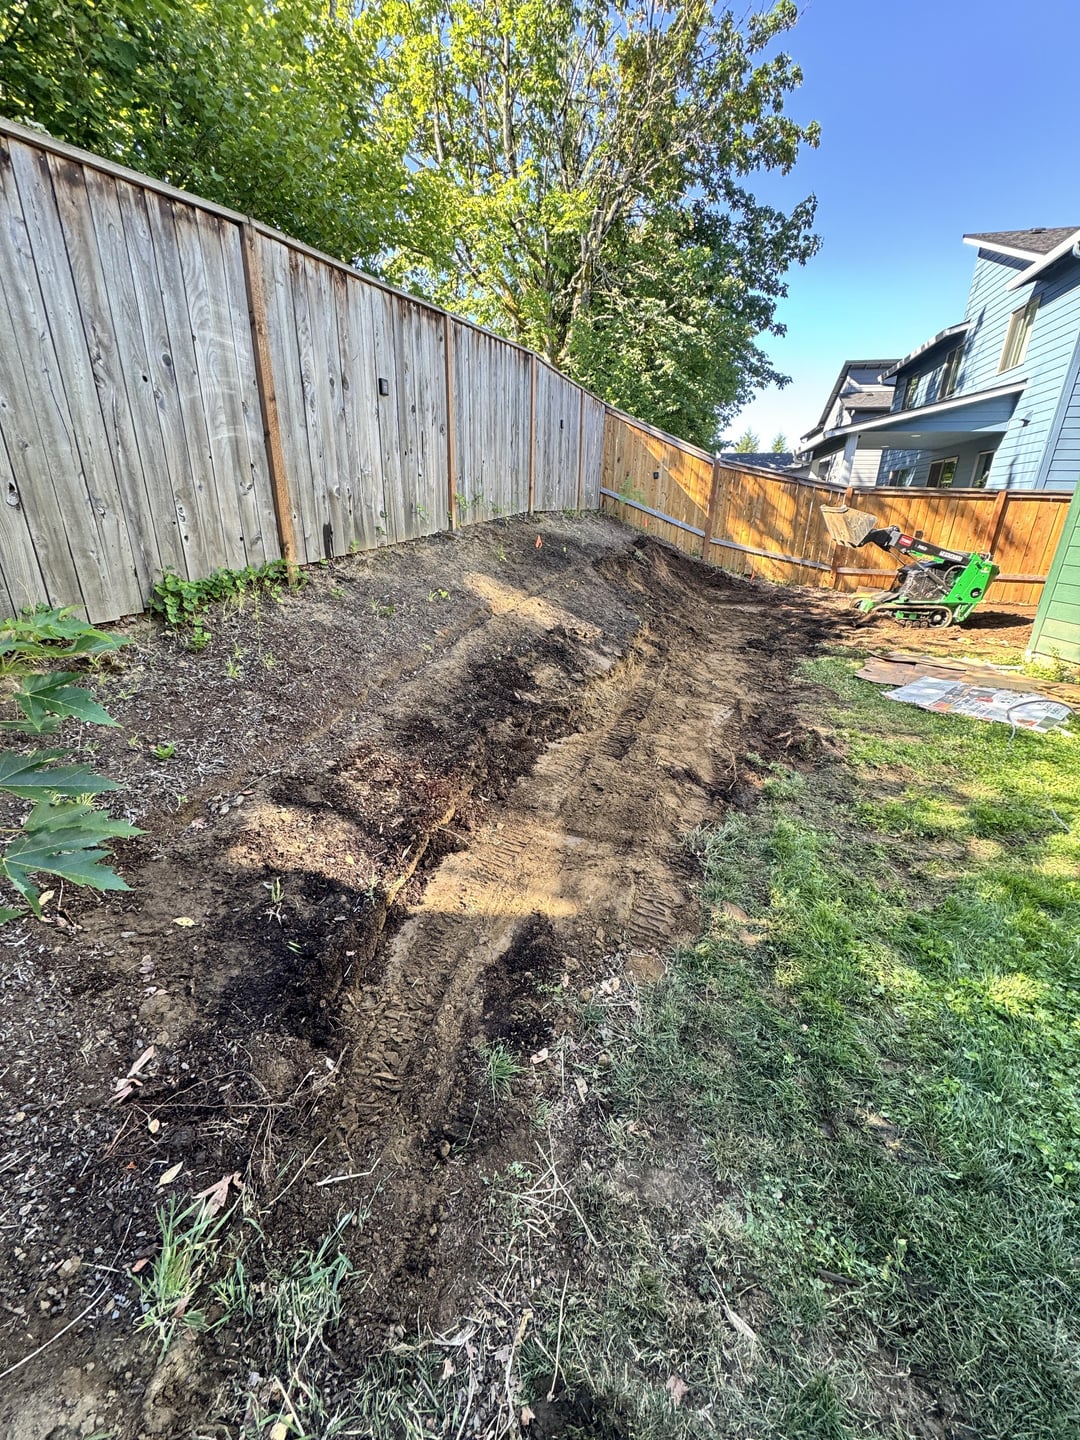
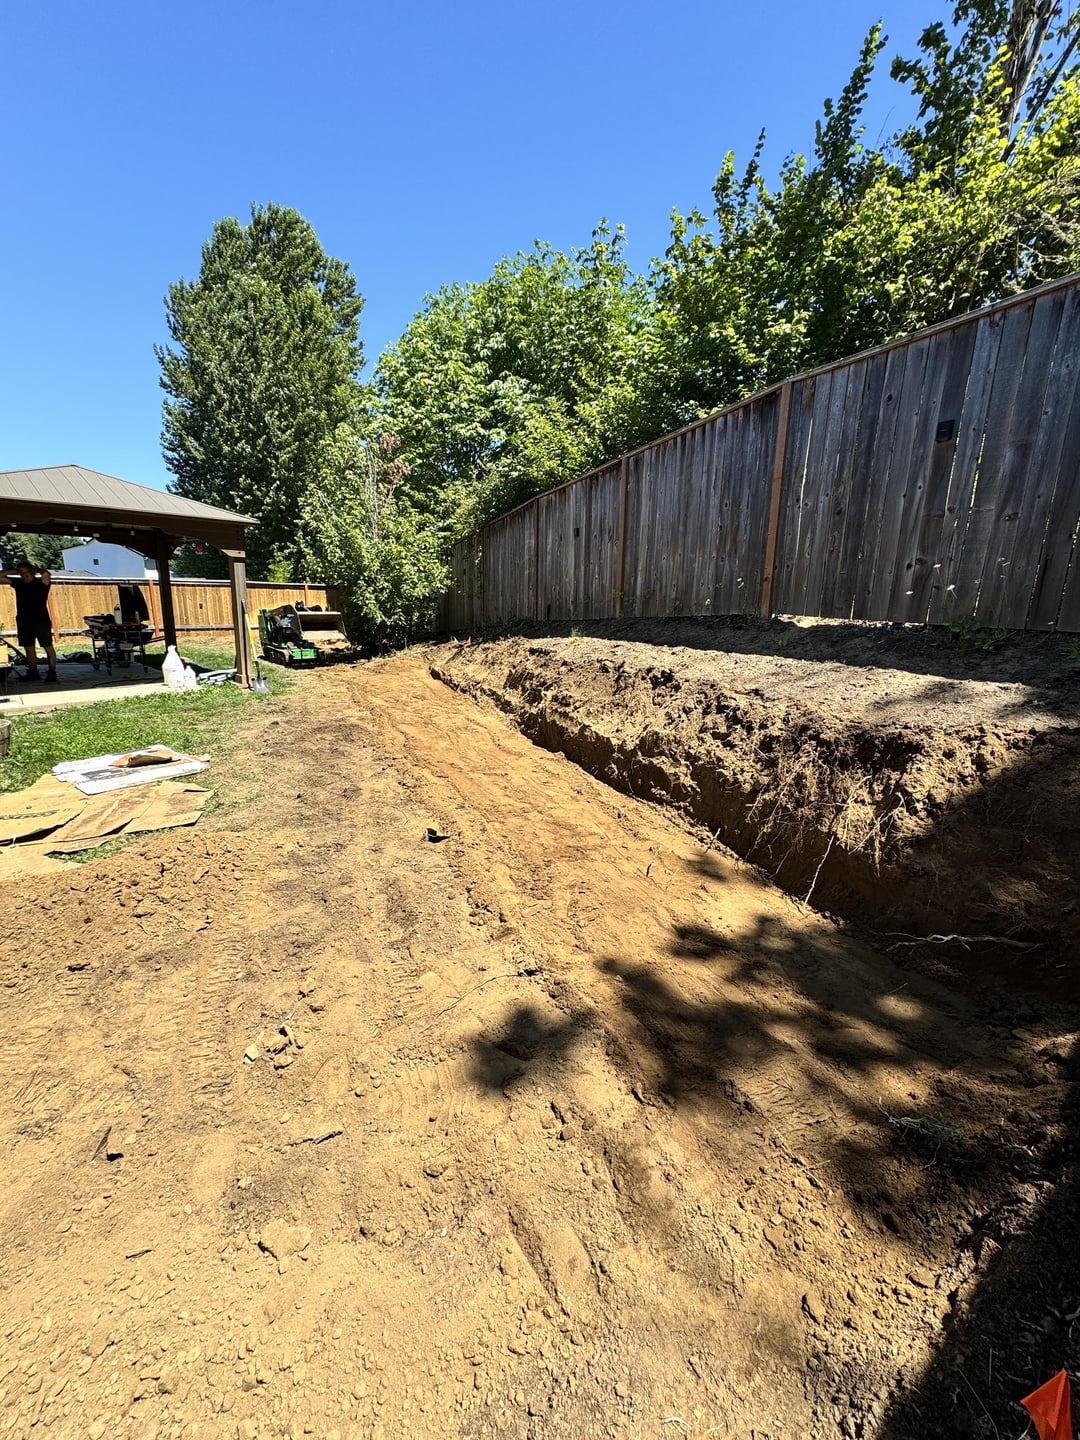
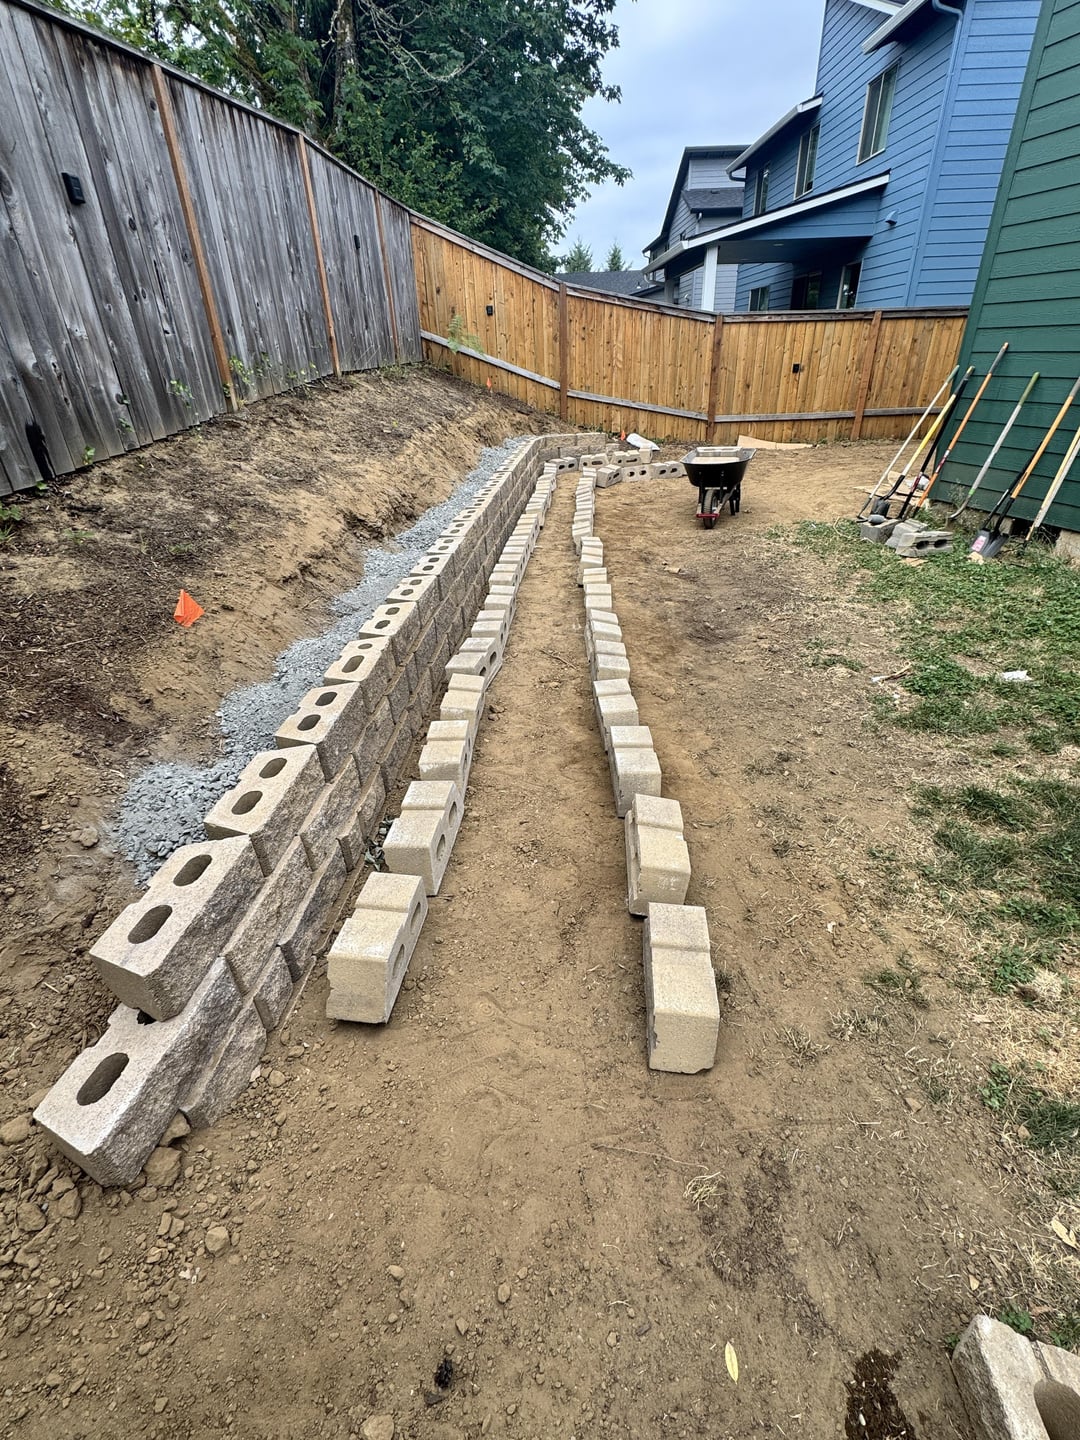
2. Excavation: Rented a skid steer to dig the wall back and wide enough for the base layer and to move the backfill materials around. The dug the trench with shovel and pickaxe
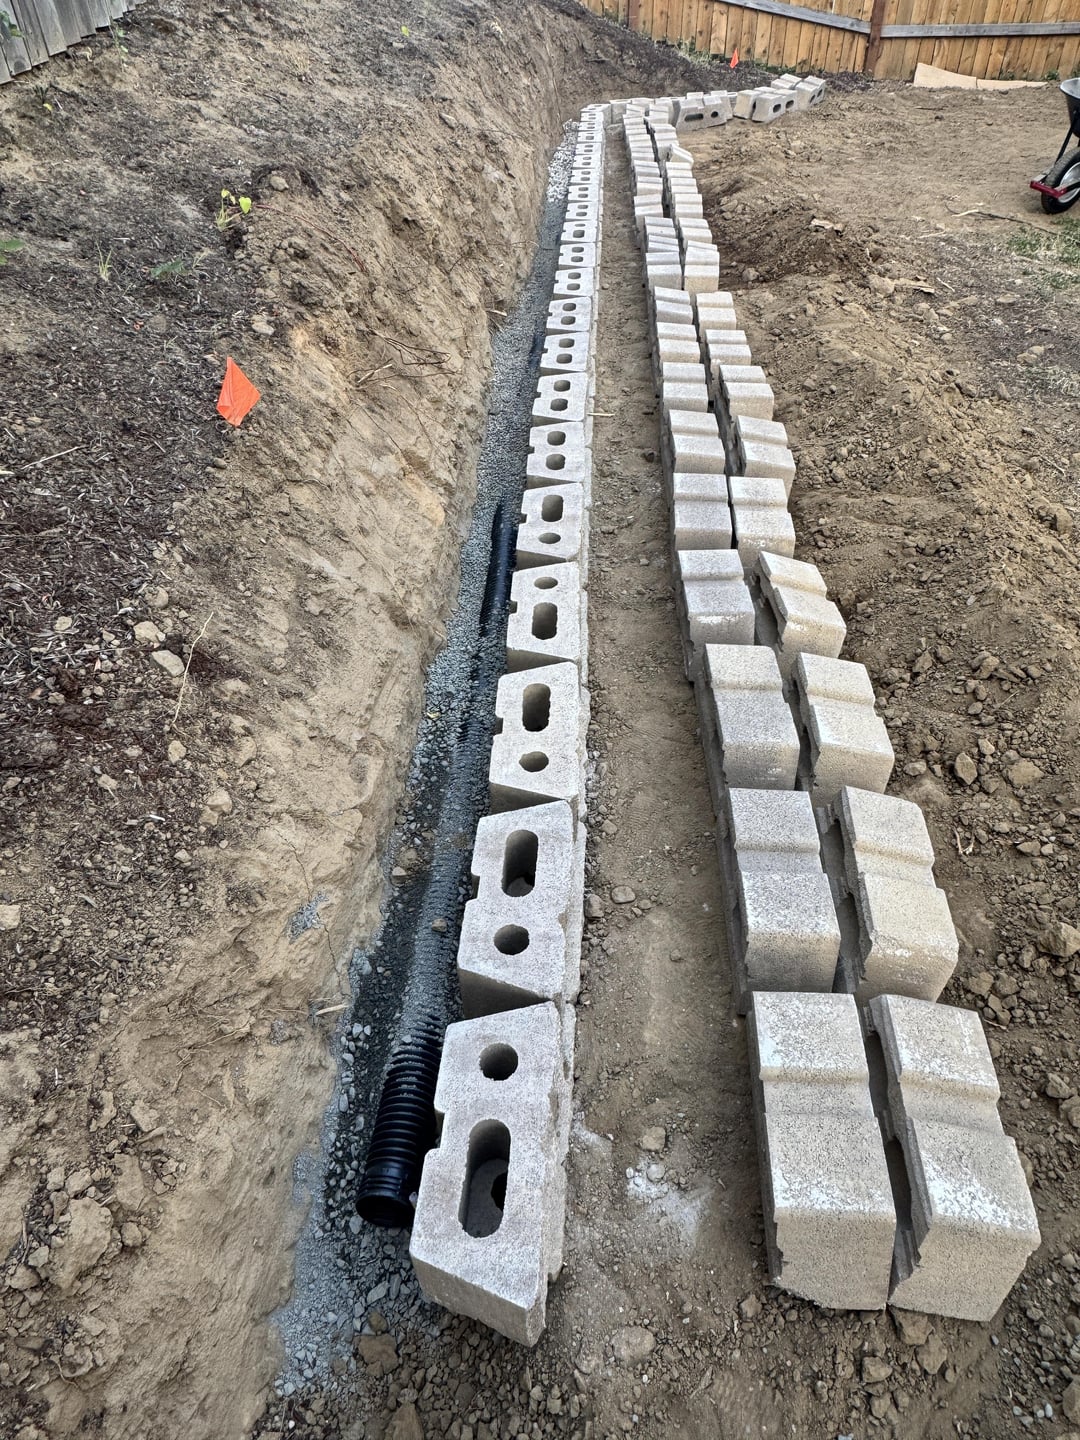
3. Base Prep: Filled the trench with compacted gravel, checked level obsessively, and laid the first course of bricks. Everything above that relies on this being right.
4. Stacking the Wall: Layered the wall blocks while backfilling and compacting as I went.
5. Drainage: Installed a French drain behind the wall with perforated pipe and clean rock, my big miss here was not installing drain fabric.
6. Lighting: Drilled conduit holes and ran low-voltage wiring before placing the final row. Connected everything to a transformer near the house.
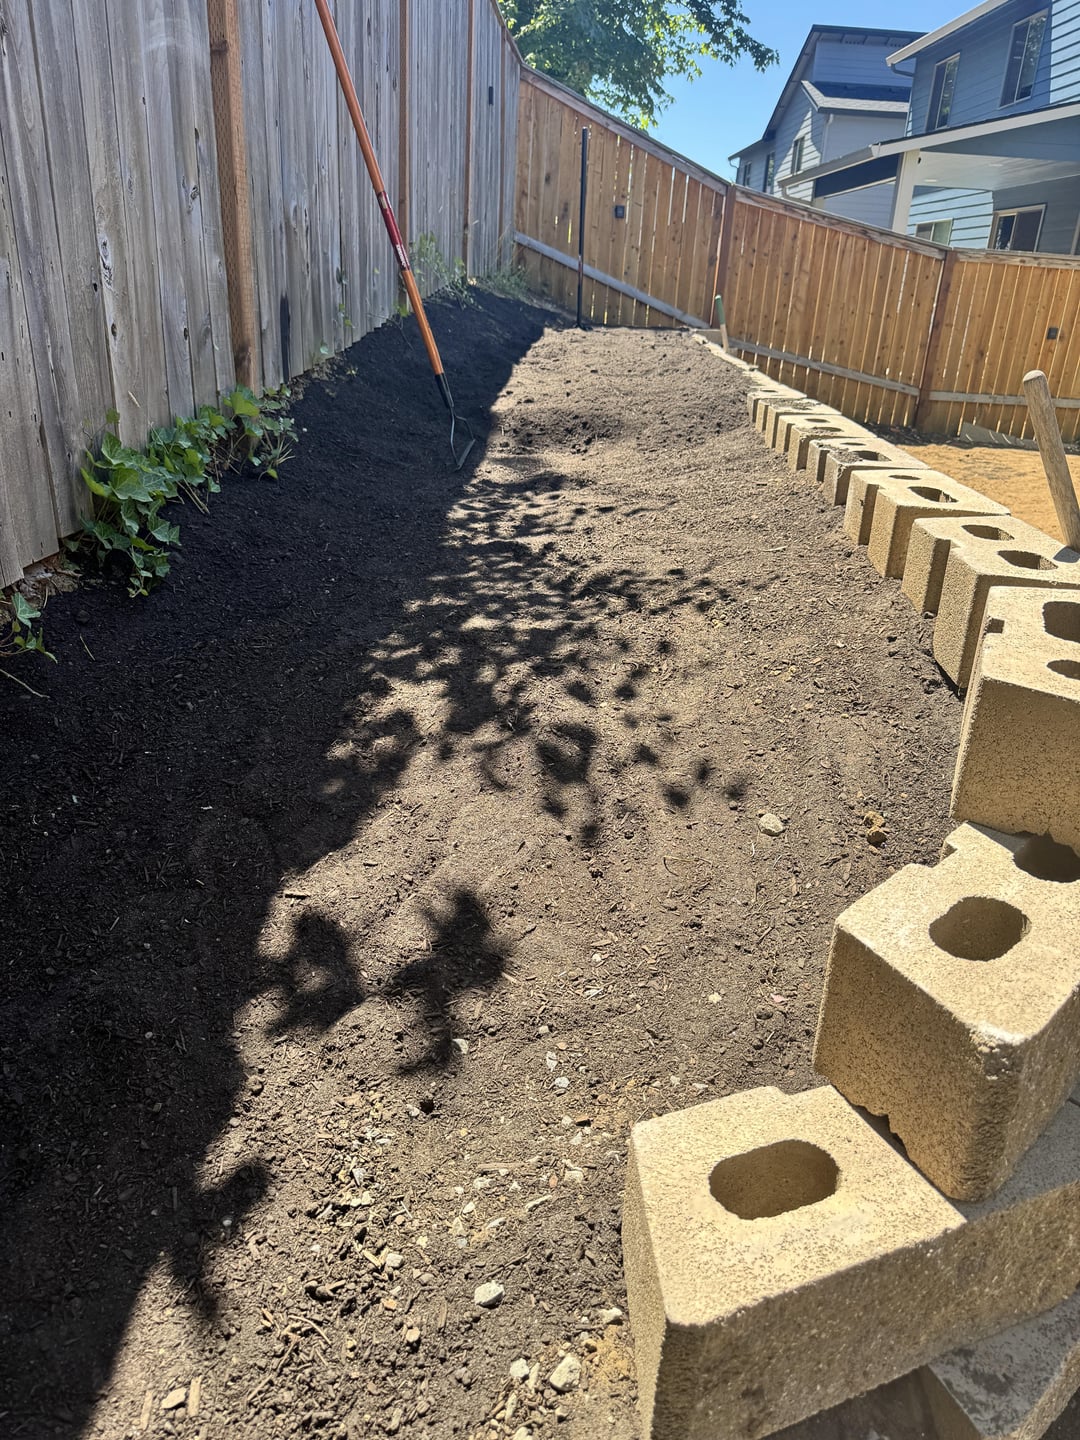
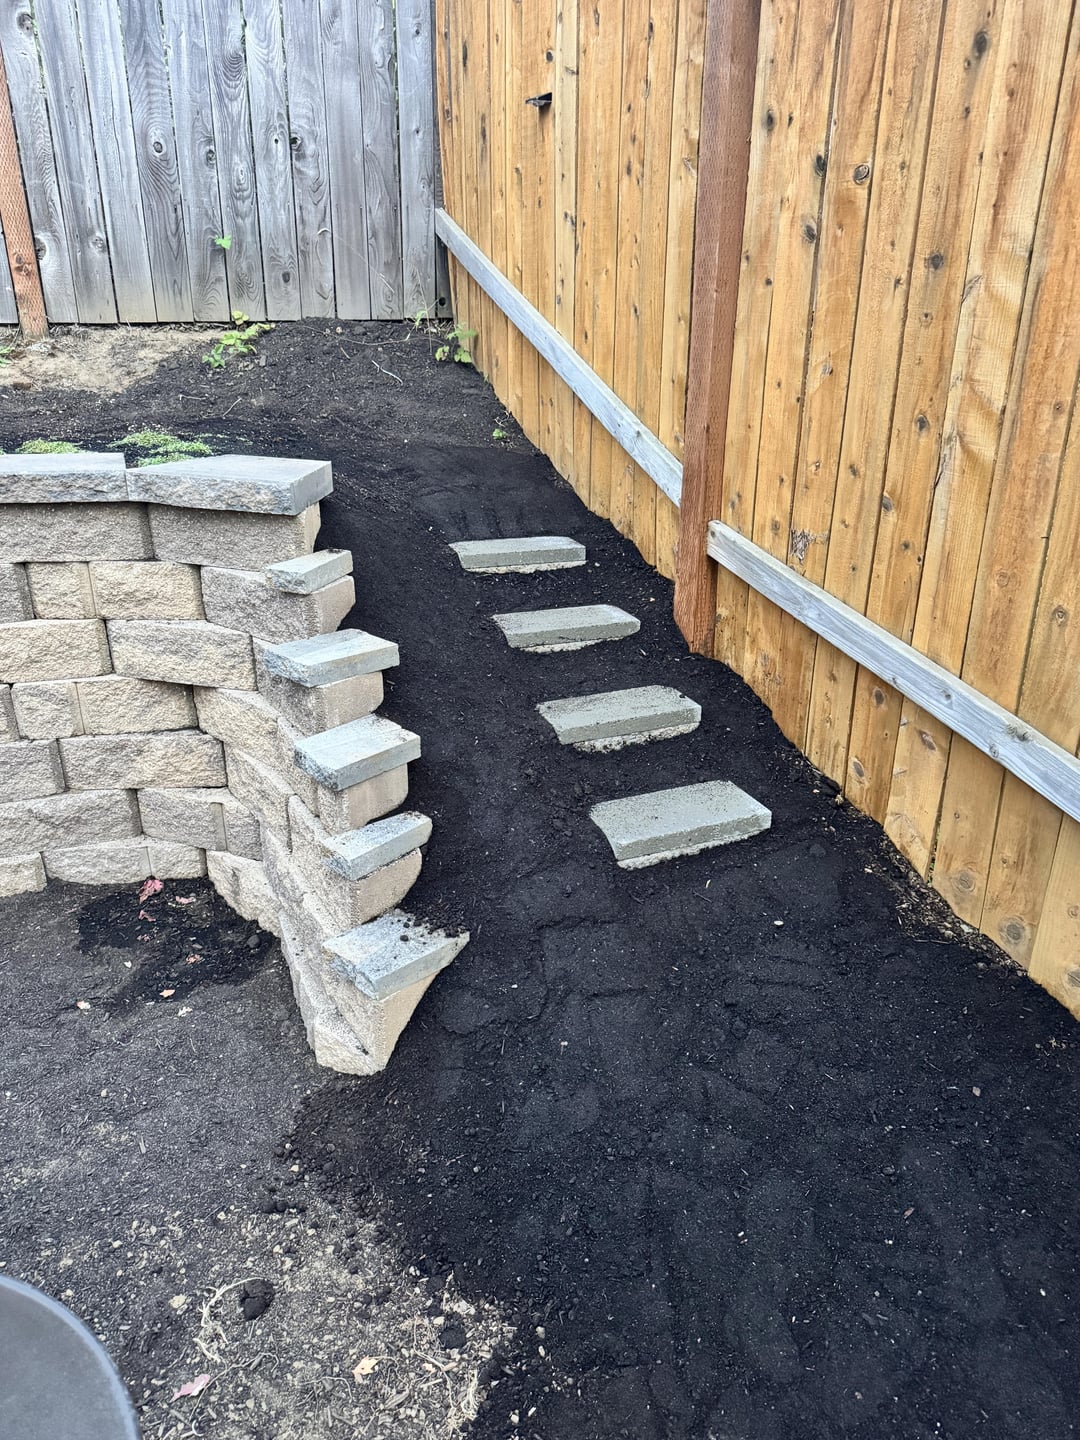
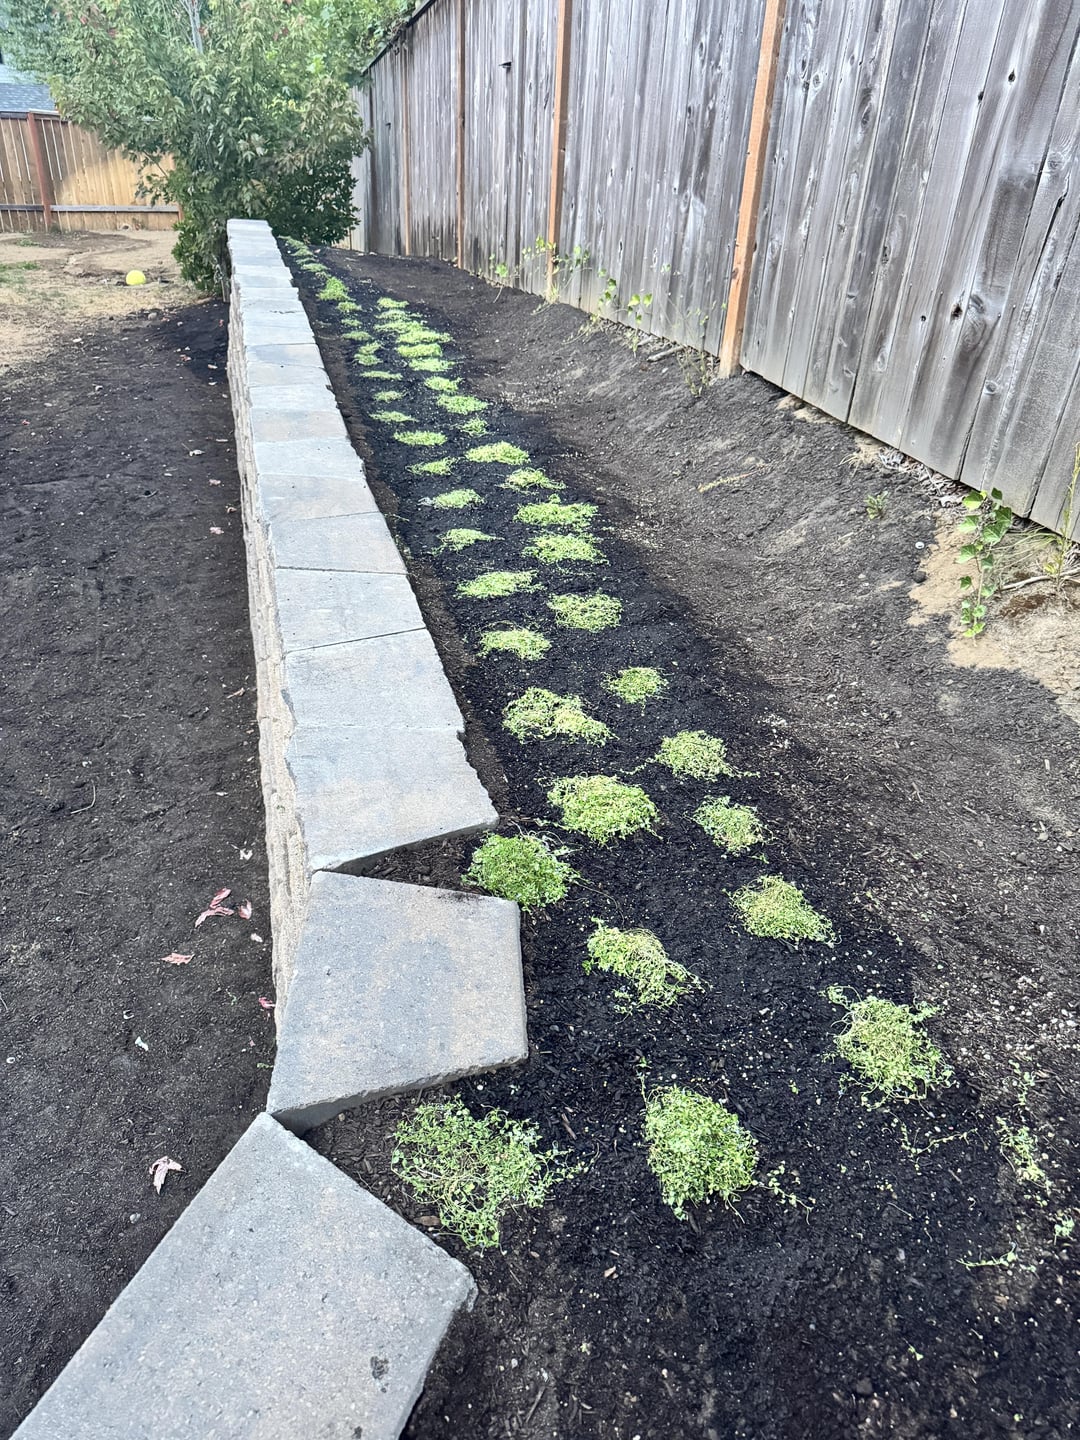
7. Finish Work: Cleaned up, shaped the soil above the wall, and started planting creeping blue star thyme for ground cover.
⸻
Budget
• Skid steer rental + delivery: $750
• Wall blocks: $3,500
• Backfill materials: ~$1,000
• Lighting system (lights, transformer, wiring): $350
• Tools + Equipment (new purchases only): $450
• Total so far: ~$6050
Timeframe
The full project took about 3–4 weekends, with evenings during the week for planning, lighting work, and detail cleanup. It’s still a work in progress at this point but happy with the outcome!
Yes, I used ChatGPT to help me with this write up. I also used ChatGPT as my project foreman to help along that way!
by SHOUT-WoT
7 Comments
Looks good… only things I would dare to critique are, i personally do is where your wall turns back in towards fense I’d bury more of the wall.. and secondly I would have used some drainage fabric around your drain pipe and between rocks and dirt. It will facilitate drainage and help wall last much much longer. Good hard work, good straight lines, and looks very flat. All in all .. good work.. hope it lasts 20 !years
At least you did it correctly, geo grid would have been nice, also drain cloth to keep the soil from working its way into the drain rock.
Caps can be cut with a diamond blade to get a nicer top cap.
Other than that it’s better than 99% of DIY.
Retaining walls that high require an engineer & contractor because it’s deadly if it collapses.
Also for home owners insurance it’s good to get this permitted & signed off on by the city or county (which you’d need the contractor/engineer)
But over all. Looks nice
Don’t take my comments and let them keep you up. It will hold up good, don’t stress it.
Idk anything about the process, but I think it looks great!
That was all that machine wanted cutting that out
Looks great. I love the lights, that’s a nice touch and probably pops well at night.
Gobsmacked
Nicely done, good job! You will enjoy it for years to come.