


I started my gardening journey in my north facing apartment using containers and transplants. Since then I’ve moved into a house with a yard and garage and want to make as much use of that space as possible. In the back of that garage I’ve set up a seed starting station, which is admitted ambitious since the only time I’d ever started seeds was back in middle school biology. However to my teacher’s credit I did learn a lot and kept that knowledge and love for plants well into my adult years. With this setup I’m hoping to get a huge head start on growing. If I do things correctly I can turn my roughly 9 month growing season into a year-round one.
I’ve done my best attempt at research and got the most commonly recommended but relatively budget friendly options I could find, and if I need to I can always upgrade parts in the future. Listed below are the parts I’ve used.
The rack:
So the entire reason why I built this setup in the first place was because of a gardening YouTube channel I follow that posted a link to a $9 iPower heating mat that was 48”x20”. I figured at that time I could learn seed starting and this would be a good entry point. Now when I first purchased the mat I didn’t really pay attention to the size so I was a bit taken aback when the 4 foot long mat that could barely fit on my dining table arrived. I knew that I had to have a dedicated space for it so the idea of the dream rack build came into fruition. While planning out the parts list I bought a cheap LED shop light from Walmart and mounted it up on some tin cans. I ran it and the heat mat together and tried growing celery and strawberry seedlings. You’ll notice I said tried because they all died within a couple weeks without ever growing true leaves. I probably did multiple things wrong but I did learn from it. For one thing I only used coco coir for the starter mix in cardboard seed treats trays with no domes and random watering. I think that the combination of poor soil, poor lighting, poor humidity, poor watering, poor temperature control, and poor user skills are what did them in but we’ll never know for sure.
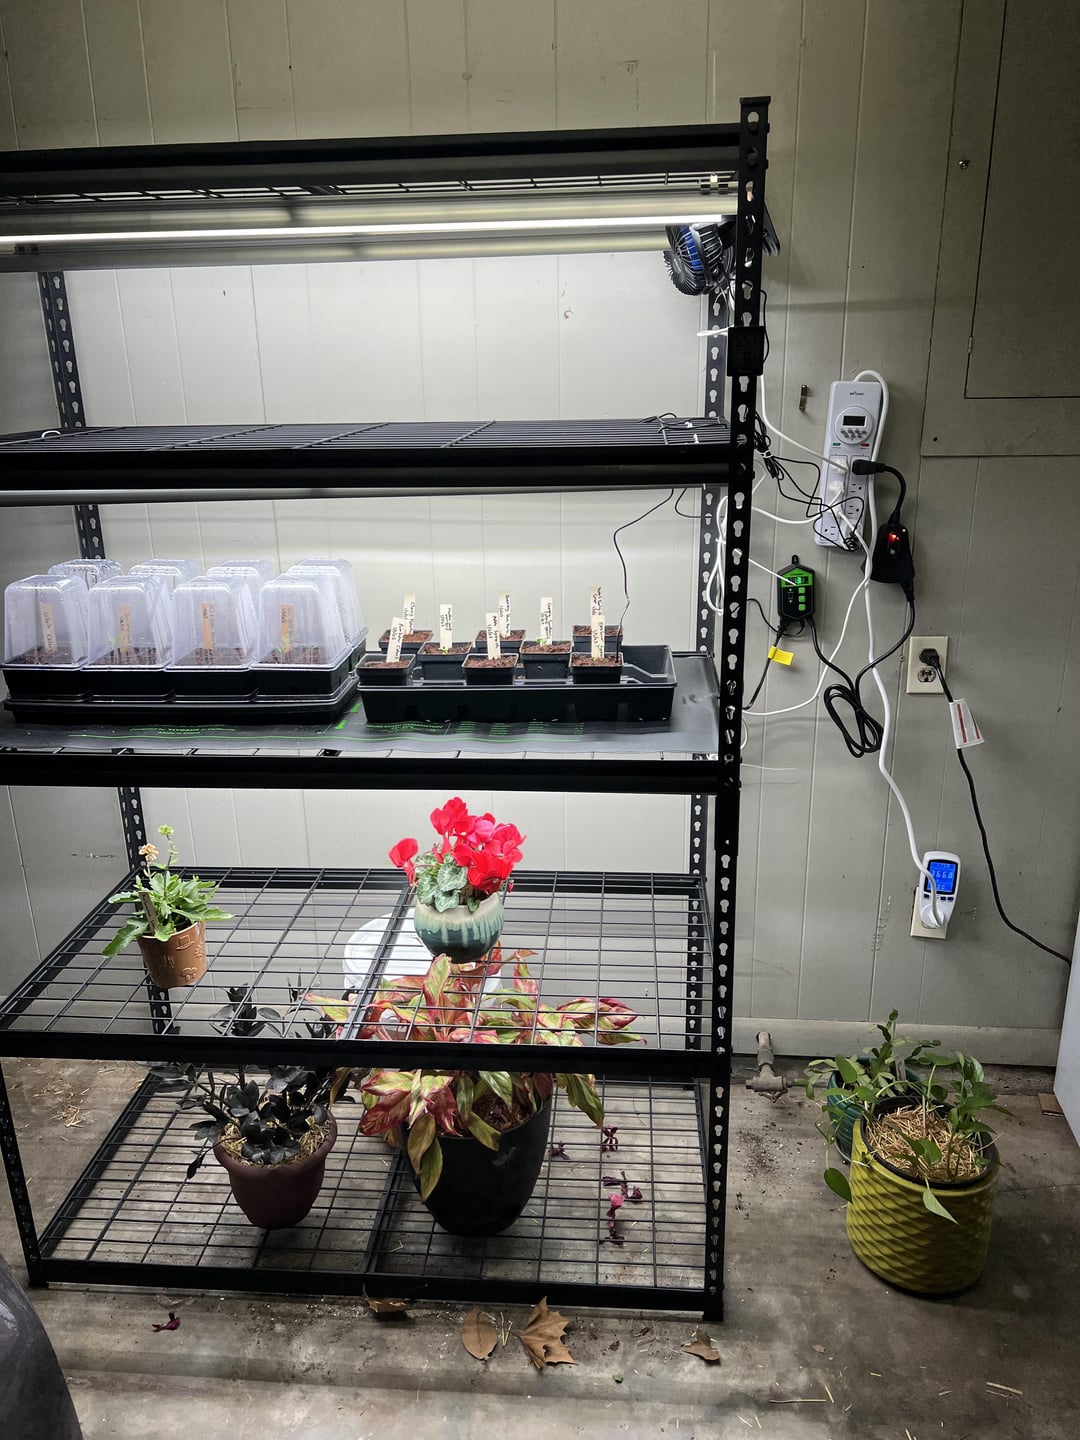
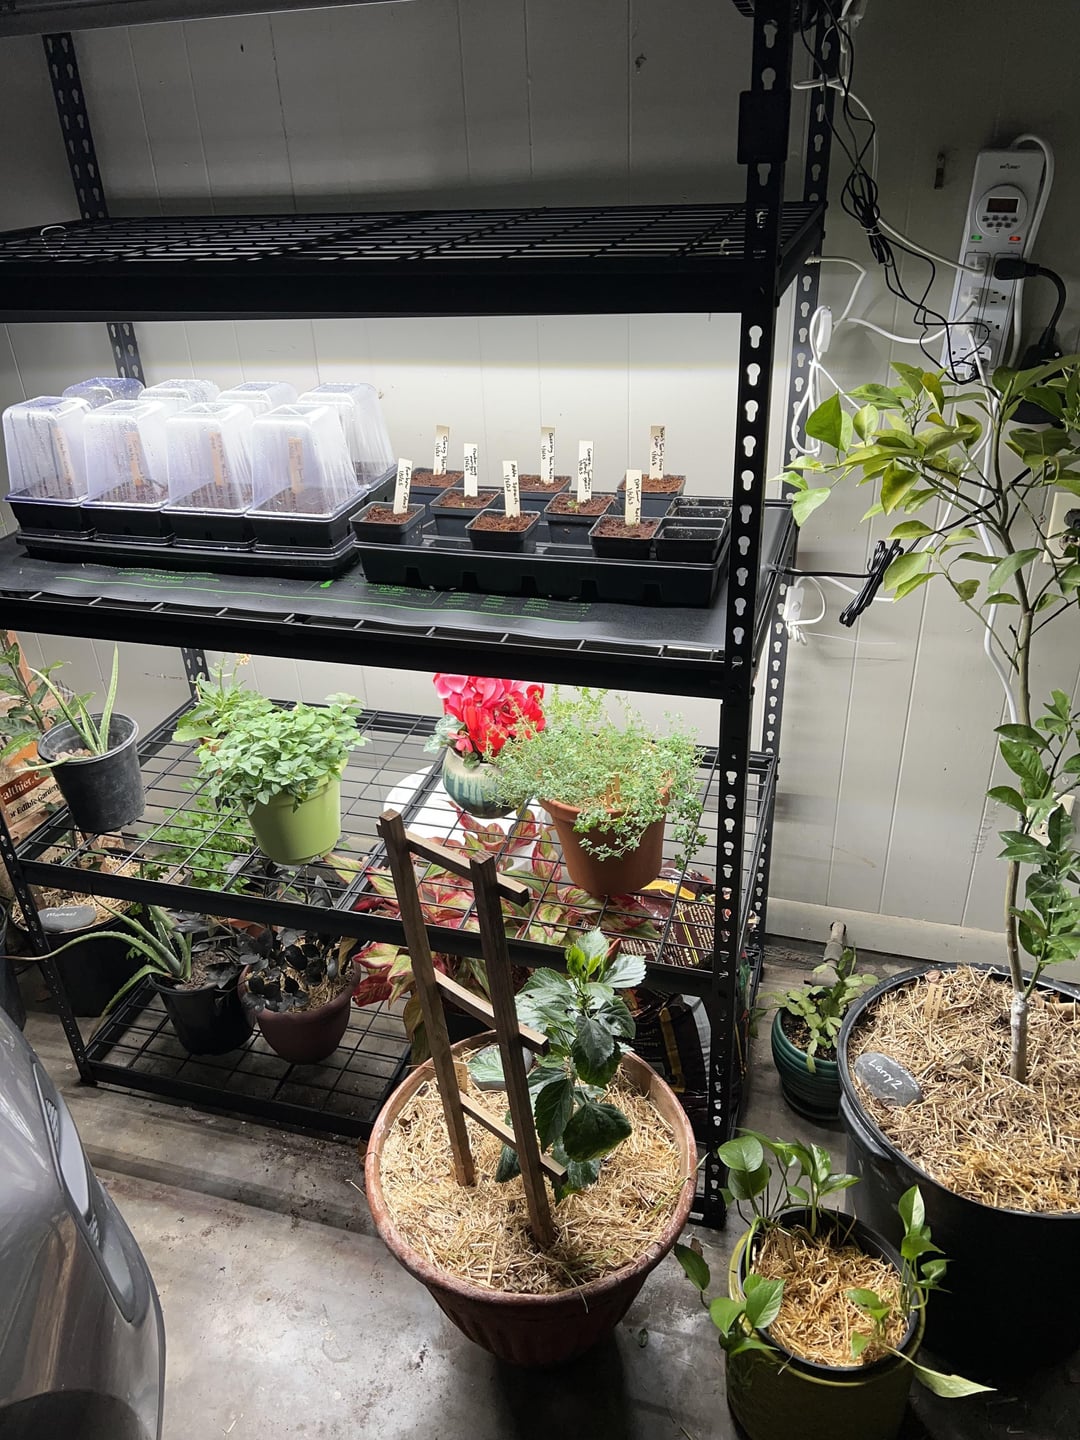
Anyway back to the build, I spent a lot of time looking for a rack that was 48” long and at least 20” deep to avoid having any heating mat overhang. I wanted 5 shelves to have space for lighting and storage. After a while I found this Vevor 5 tier shelf that’s 48”x24”x72”. It’s metal, is put together super easily, and has plenty of space for the mat.
Lights:
Conveniently most grow lights come in 48” tubes and that fits perfectly on the shelf. I’m not willing to spend huge amounts of money right off the bat so I went with slightly better than shop light LEDs. These Barinna full spectrum lights fit the bill, have pretty good reviews across Amazon, Reddit, and YouTube (likely due to some typical shilling but overall the consensus seems to be positive). On each of the top three shelves I have two lights. You’ll see that the lights are pretty high up. Barinna recommends to keep germinating seeds between 11” and 19” from the lights. Right now the top of my soil sits just under 11” from the lights. I know that common internet knowledge is 2-3” above the seedlings but I see reviews of the lights mentioning burning when they’re too close so I’ll adjust the height if needed. I’ve been running them for a week now and already have cotyledons on most plants and true leaves only about a day or so from emerging. They run from 6AM to 10PM.
Heat mat:
Originally the heat mat I had was the iPower mat, but reviews mentioning burns and potential fires steered me to return the mat and replace them with a Vivosun mat. I checked the soil temp with a normal thermometer (shoutout Thermopop) and I noticed it was 90°F which is a bit warmer than I’d be comfortable with, so I got the Vivosun thermostat to regulate the temp to a cool 74°F and so far it works wonderfully. When the soil gets up to temp the heat mat shuts off. I’m 100% certain that if I didn’t have this heat mat I would still be waiting on all my seeds to germinate. I have the mat and thermometer plugged into a remote controlled outlet just for any situation where I need to turn the whole heat system off but not the lights or fans.
Outlet:
The outlet for everything is a BN-Link timed outlet. Half the outlets are on a 6AM-10PM daily timer and the other half are always on. My lights are on the timed half and the fans and heat mat are always on, with the heat on the previously mentioned remote outlet. Originally I had the heat mat on the timed side but since getting the thermostat I switched it to 24/7 at 74°F.
Fans:
The fans are generic Beskar usb fans that are plugged into a 4 port usb hub. I have the fans on for a couple hours a day to strengthen the stems of the seedlings. Then they go right back under the humidity domes. I do wish I had gotten oscillating fans but that’s just lessons for future me.
Misc:
In addition to the main setup I also added a thermostat/humidity sensor to keep track of my garage climate and my trusty wattage meter to keep track of electricity usage. Speaking of electricity, when everything on the rack is running at full tilt, it uses about 388 watts of power at peak, but it won’t be running 100% capacity 24/7. Right now with only 4 lights running and the heat mat occasionally cutting on, I hover around 268 watts in the daytime and for the lights off period it’s between 2 and 40 watts depending if the heating mat is on. With my electricity costs being $.05/kWh at its highest point in the year, assuming I run this setup 24/7 at 100% load it would cost me about $14.17 a month or $170.06 a year to run, which is pretty good in my book.
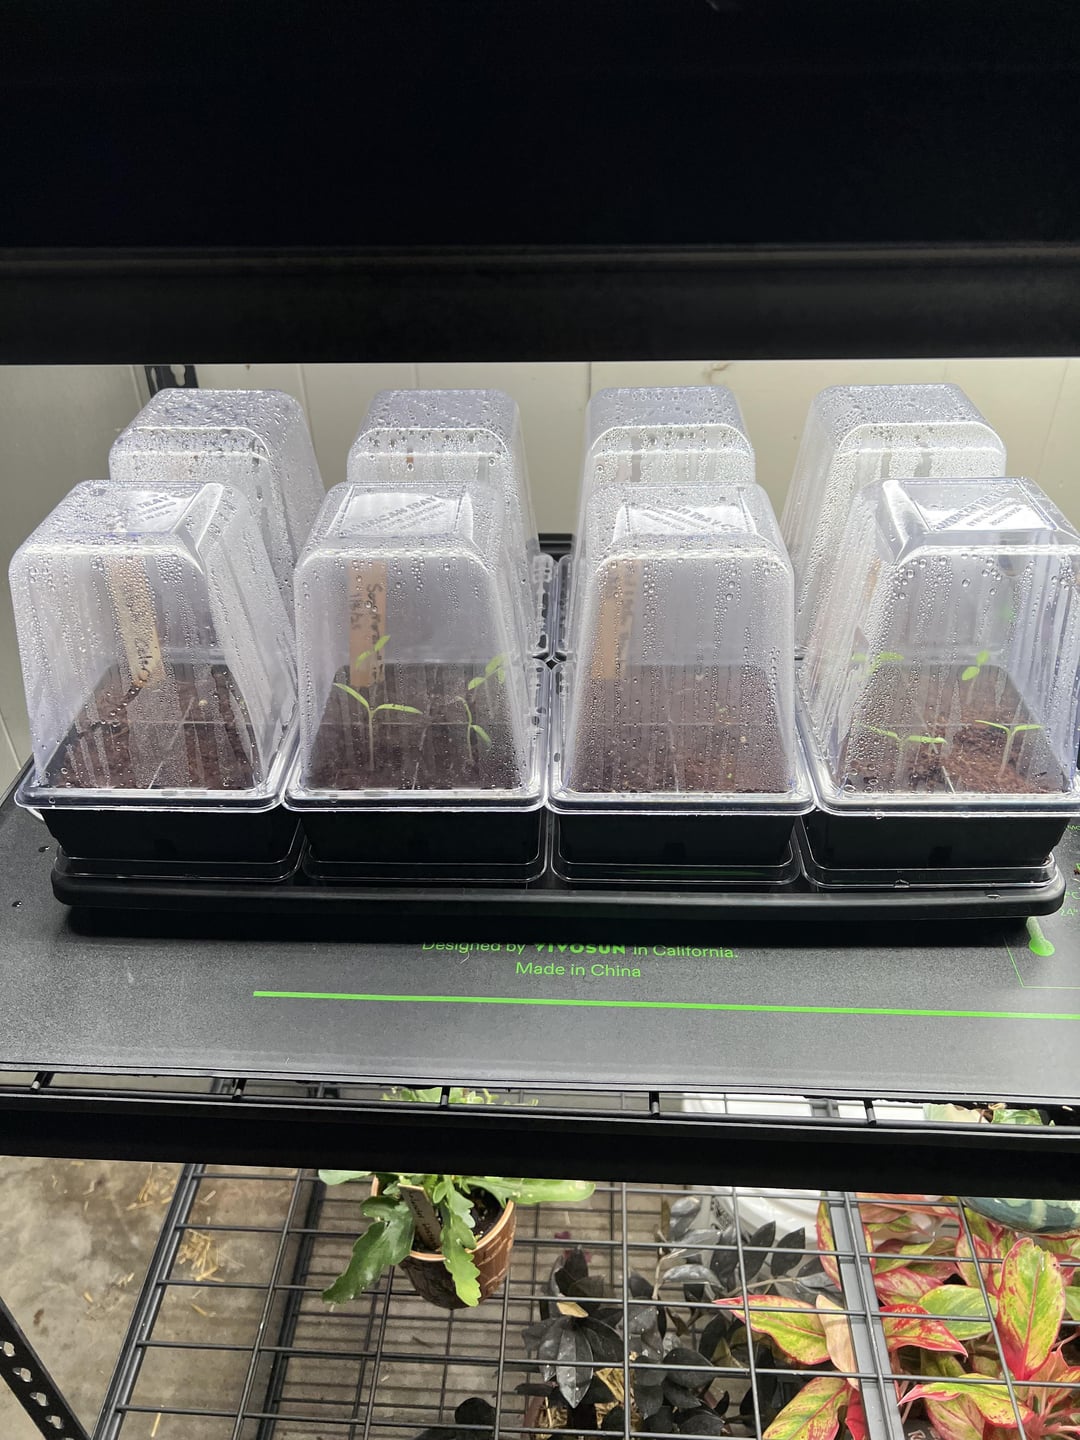
My seed trays are a mixed bag, I have some generic plastic trays that I got from a local nursery, but I recently balled out for the Epic Gardening 4 cell trays with the domes and watering trays and I’m not gonna lie, they’re pretty damn great. It keeps the moisture in really well; it’s been about 8 days since I put in seeds and I still haven’t had to water them. The soil stays at a perfect temp and the seedlings are growing like crazy. The only downside is that these bastards are $70 which is insanely expensive but I’d be lying if I said I won’t be buying them again.
I am doing something very unorthodox with the seed starting mix, the bottom 70% of the tray is filled with Fox Farm Happy Frog and the remaining portion on top is 100% coco coir. I figured that I could give the seeds a loose material that’s easy to push through for the first leaves and when it grows roots further down it’ll be able to pull nutrients from the Happy Frog. There’s a really solid chance that this is completely dumb to do and I’m sure a soil scientist could explain every reason why it’s wrong but hey, you live and you learn. So far everything is doing miles better than my first attempt so I’m gonna keep trying this method out and see how it handles in the future compared to just soil or just coco coir.
Prices:
I tried my best to maintain a reasonable budget for everything. For the actual rack setup prices are as listed:
Rack $119
Lights $85
Heat mat $36
Thermostat $18
Fans $39
USB hub $8
Thermometer $8
Surge protector $26
Remote outlet $15
Total price: $354 roughly. Not the cheapest by any means but it’ll last me for hopefully years to come and I’ll definitely be getting my money’s worth with all the new seeds I’ll be able to start. If anyone is on the fence about building something like this I can say wholeheartedly that it’s worth it. I’ve spent so much time just standing in front of it admiring my hard work. You’ll do the same, I promise.
by BigDickNick6Rings